Groundlight provides a powerful programming paradigm when processing image and video feeds. With the ability to quickly get human level understanding of your visual data, you can turn any camera into a smart camera, set up continuous monitoring, and get actionable alerts.
Here we’ll show you how little code you need to get started, and work step by step through the setup. You can also check out our companion video and follow along.
What’s Below:
Prerequisites
Before getting started:
- Make sure you have python installed
- Install VSCode
- Make sure your device has a c compiler. On Mac, this is provided through XCode while in Windows you can use the Microsoft Visual Studio Build Tools
Environment setup
Before you get started, you need to make sure you have python installed. Additionally, it’s good practice to set up a dedicated environment for your project.
You can download python from https://www.python.org/downloads/. Once installed, you should be able to run the following in the command line to create a new environment
python3 -m venv gl_envOnce your environment is created, you can activate it with
source gl_env/bin/activateFor Linux and Mac or if you’re on Windows you can run
gl_env\Scripts\activateThe last step to setting up your python environment is to run
pip install groundlight
pip install framegrab
in order to download Groundlight’s SDK and image capture libraries.
Authentication
In order to verify your identity while connecting to your custom ML models through our SDK, you’ll need to create an API token.
1. Head over to http://dashboard.groundlight.ai/ and create or log into your account
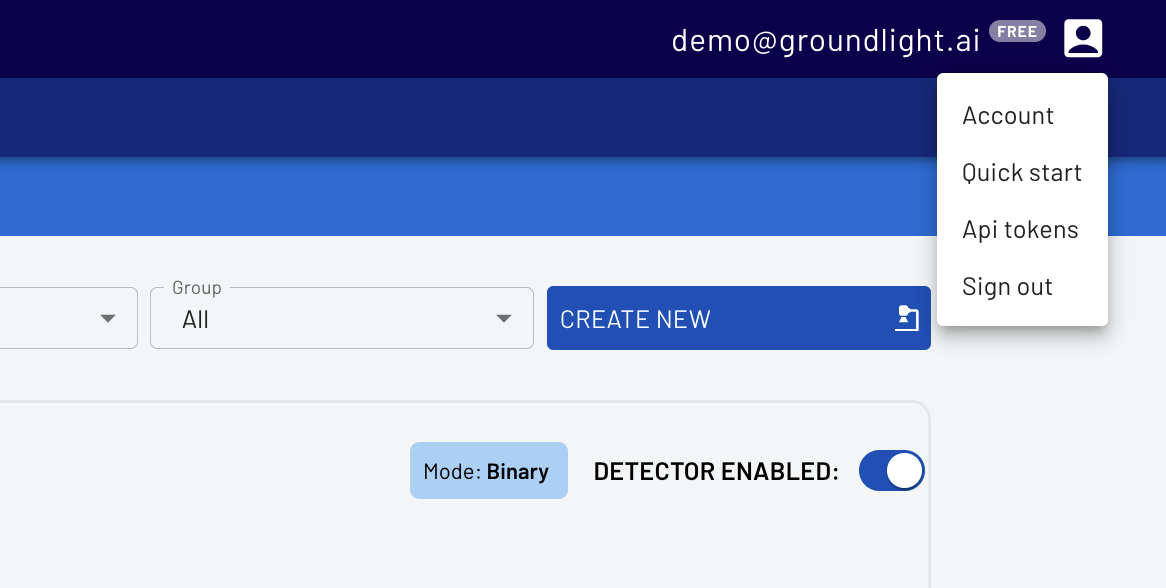
2. Once in, click on your username in the upper right hand corner of your dashboard:

3. Select API Tokens, then enter a name, like ‘personal-laptop-token’ for your api token.

4. Copy the API Token for use in your code
IMPORTANT: Keep your API token secure! Anyone who has access to it can impersonate you and will have access to your Groundlight data
$env:GROUNDLIGHT_API_TOKEN="YOUR_API_TOKEN_HERE"Or on Mac
export GROUNDLIGHT_API_TOKEN="YOUR_API_TOKEN_HERE"
Writing the code
For our first demo, we’ll build a detector that checks if a trashcan is overflowing. You can copy the following code into a file inside your VSCode or check out the github page.
You can start using Groundlight with a USB camera attached to your computer in just 15 lines of Python!
import groundlight
import cv2
from framegrab import FrameGrabber
import time

gl = groundlight.Groundlight()

detector_name = "trash_detector"
detector_query = "Is the trash can overflowing"

detector = gl.get_or_create_detector(detector_name, detector_query)

grabber = list(FrameGrabber.autodiscover().values())[0]

WAIT_TIME = 5
last_capture_time = time.time() - WAIT_TIME

while True:
	frame = grabber.grab()

	cv2.imshow('Video Feed', frame)
	key = cv2.waitKey(30)

	if key == ord('q'):
    		break
	# # Press enter to submit an image query
	# elif key in (ord('\r'), ord('\n')):
	# 	print(f'Asking question: {detector_query}')
	# 	image_query = gl.submit_image_query(detector, frame)
	# 	print(f'The answer is {image_query.result.label.value}')

	# # Press 'y' or 'n' to submit a label
	# elif key in (ord('y'), ord('n')):
	# 	if key == ord('y'):
	#     	label = 'YES'
	# 	else:
	#     	label = 'NO'
	# 	image_query = gl.ask_async(detector, frame, human_review="NEVER")
	# 	gl.add_label(image_query, label)
	# 	print(f'Adding label {label} for image query {image_query.id}')

	# Submit image queries in a timed loop
	now = time.time()
	if last_capture_time + WAIT_TIME < now:
    		last_capture_time = now

    		print(f'Asking question: {detector_query}')
    		image_query = gl.submit_image_query(detector, frame)
    		print(f'The answer is {image_query.result.label.value}')

grabber.release()
cv2.destroyAllWindows()
This code will take an image from your connected camera every minute and ask Groundlight a question in natural language, before printing out the answer.
Using your computer vision application
Just like that, you have a complete computer vision application. You can change the code and configure a detector for your specific use case. Also, you can monitor and improve the performance of your detector at https://dashboard.groundlight.ai/. Groundlight’s human-in-the-loop technology will monitor your image feed for unexpected changes and anomalies, and by verifying answers returned by Groundlight you can improve the process. At dashboard.groundlight.ai, you can also set up text and email notifications, so you can be alerted when something of interest happens in your video stream.
If you're looking for more:
Want to deploy your Groundlight application on a dedicated device? See our guide on how to use Groundlight with a Raspberry Pi.
Check out the docs to learn how to further customize your app.


