In Groundlight's dashboard, Groundlight offers a way to "demo" building a computer vision application (for free!), without even needing to touch code. Signing up for a Groundlight account is free, and the process is simple and straightforward. All you need is your computer and a webcam (or another external camera).
Groundlight AI's computer vision platform helps you tackle many interesting and challenging problems, such as quality control in manufacturing, retail analytics, detecting proper PPE usage in construction and more. Unlike traditional computer vision, our technology can be seamlessly integrated with your existing surveillance cameras, and uses natural language processing to answer questions about your images.
This guide is great for:
- Those who are developers but want a high level understanding of how Groundlight's computer vision works - after which they can check out the step by step guide on building a custom computer vision application using Groundlight's Python SDK
- Those who aren't developers but want to "try out" Groundlight's computer vision platform
Ready to build your own first computer vision application? Let's get started.
What's below
- STEP 1: Register for a free account
- STEP 2: Find the 'DEMO' Tab
- STEP 3: Connect your computer camera
- STEP 4: Choose your binary query
- STEP 5: Set your model's confidence threshold
- STEP 6: Start capturing images
- STEP 7: Understanding Cloud Labeling
- STEP 8: Get Projected Machine Learning Accuracy and labeling your image queries
- STEP 9: Learn more about Machine Learning Accuracy details
STEP 1: Register for a free account
To start making your no-code computer vision model today, register for a free Groundlight AI account by visiting "Try It Free" on Groundlight AI or signing up through dashboard.groundlight.ai:

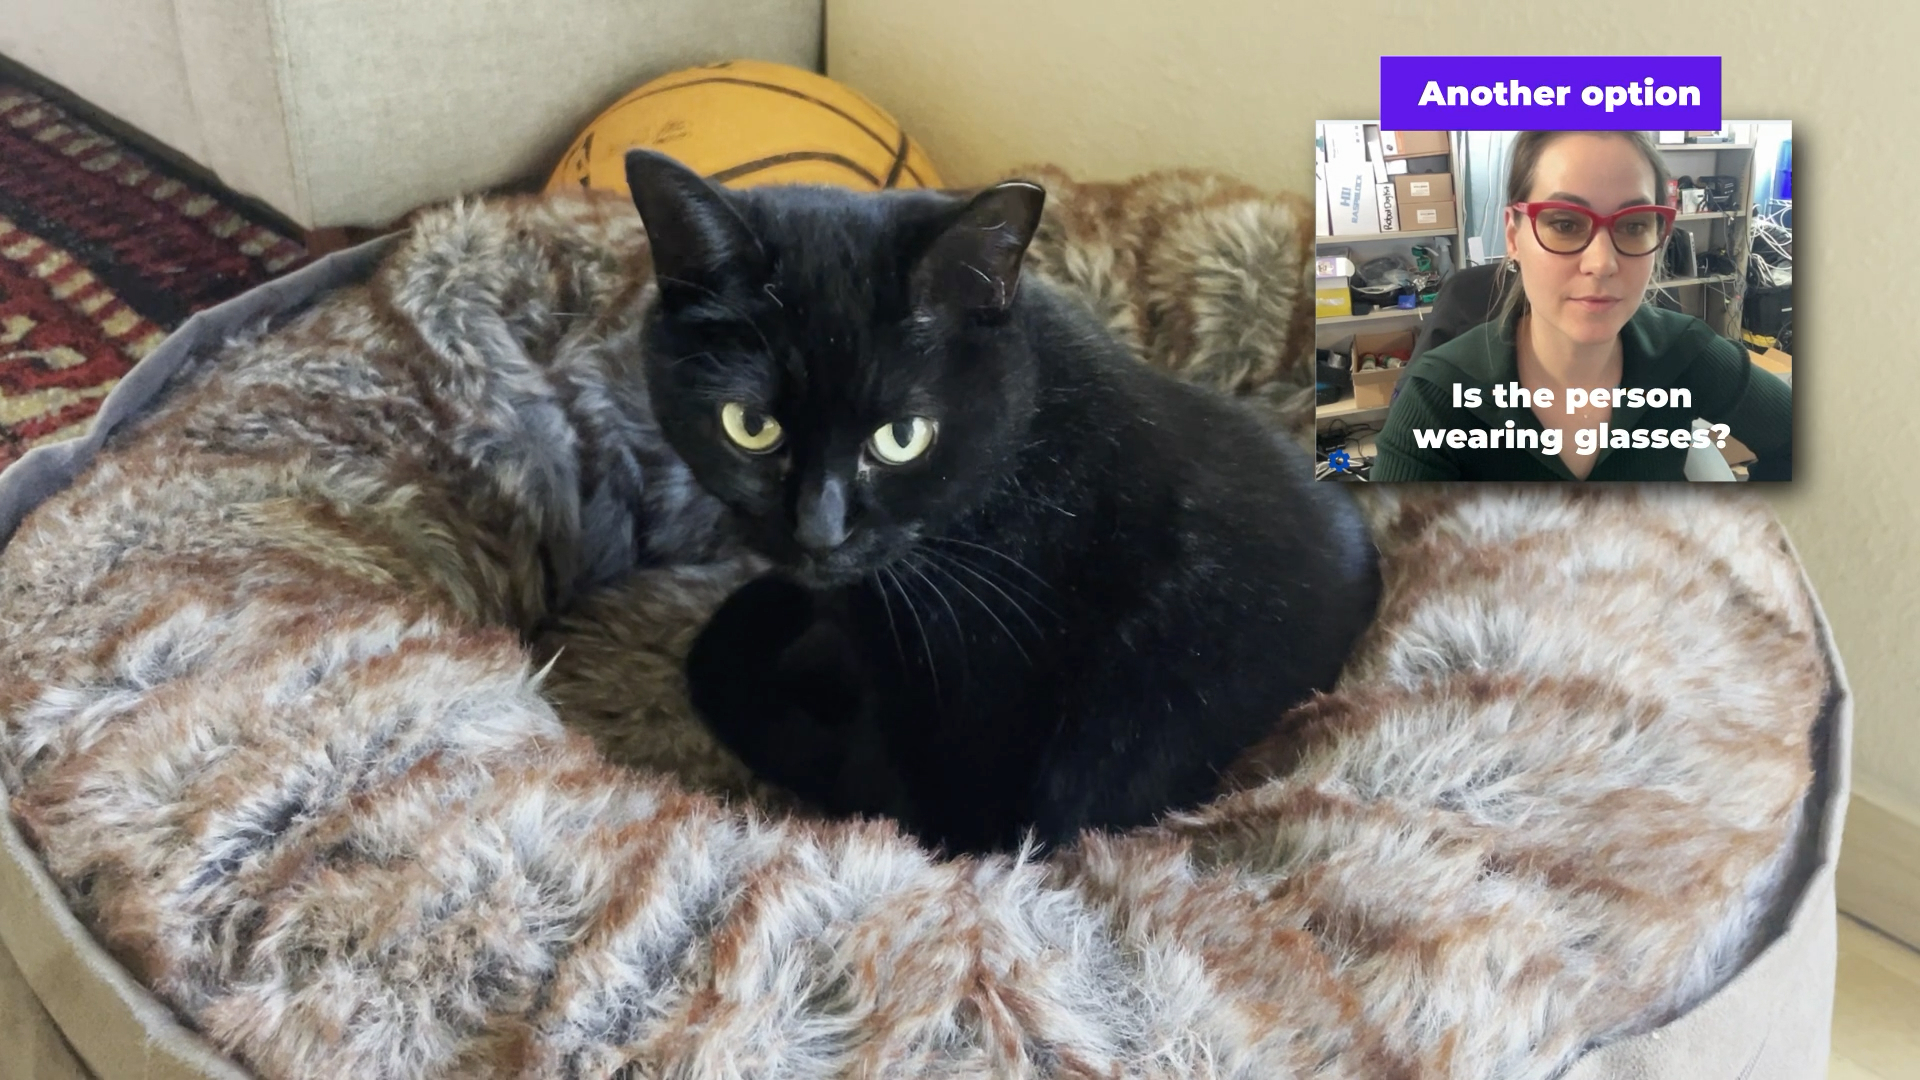
To create your own computer vision model, you'll need: A computer with a camera (your laptop camera will do) and a subject to train the model. Pictured here, the subject used is a house cat ("is the cat on the couch?"), but you can also just experiment with yourself wearing glasses ("is the person wearing glasses?"), giving a thumbs up ("is the thumb facing up?") and more.
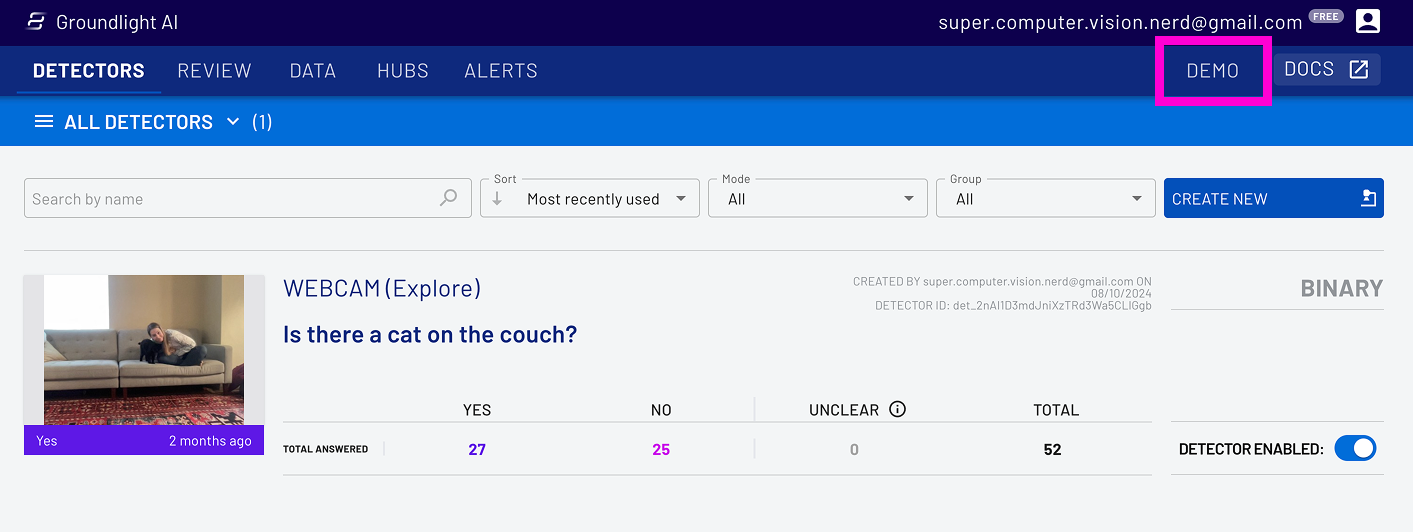
STEP 2: Find the 'DEMO' Tab.
Once you've registered, go to the Dashboard and click on the 'DEMO' tab.
3. Connect your computer camera
Next, connect your laptop or any other computer camera that you plan on using for this project. You'll have to give Groundlight permission to access the camera.
.png)
4. Choose your binary query
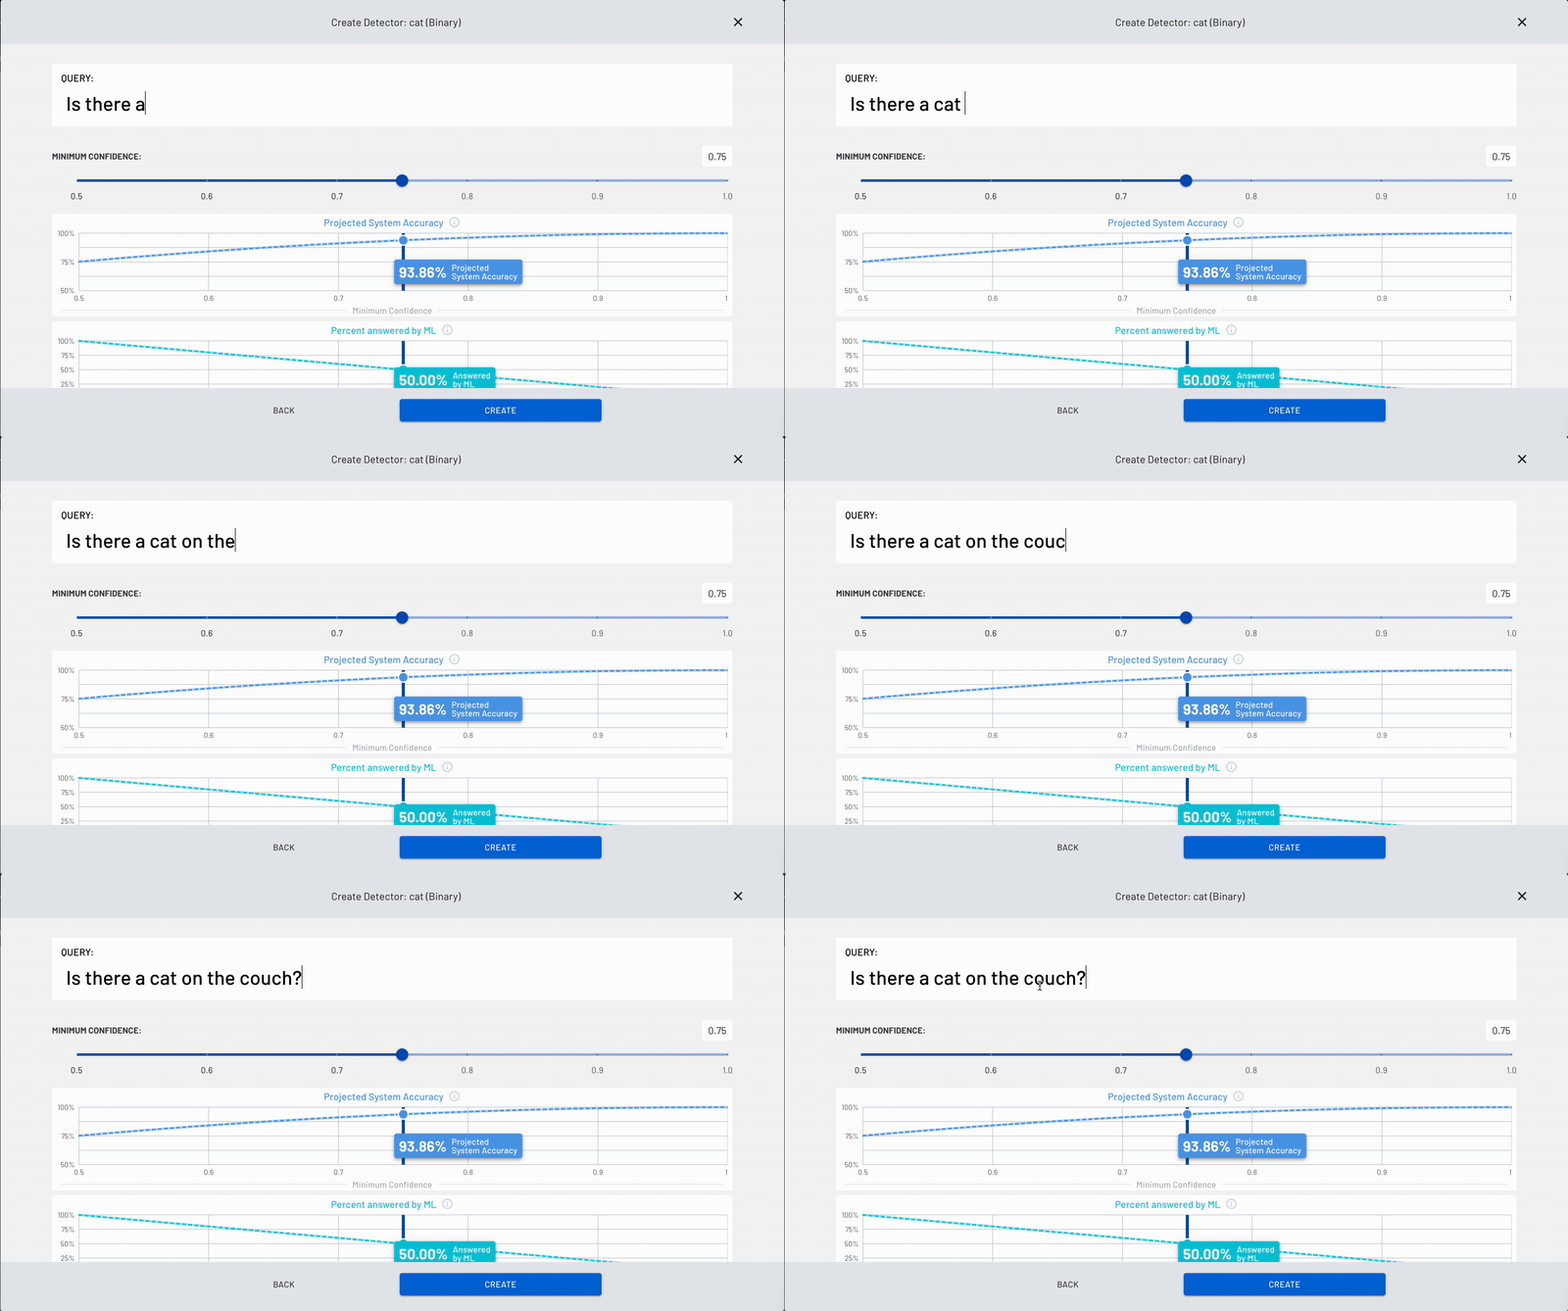
A page will pop up where you'll be able to create a binary (Yes/No) query, also known as a "detector". This detector is essentially a computer vision model or application, it's what you are detecting. Just type your question in the white box marked 'Query' and click 'Create' on the bottom right-hand side of the screen when you're done.
Note: Counting is available but for paid users but is not available on the Demo page.
The binary query in this example shown is, "Is the cat on the couch?" but as mentioned previously, you can choose your own query.
Whatever you decide on, just make sure that it is a clear binary query (Yes/No) and is as objective as possible.
5. Set your model's confidence threshold
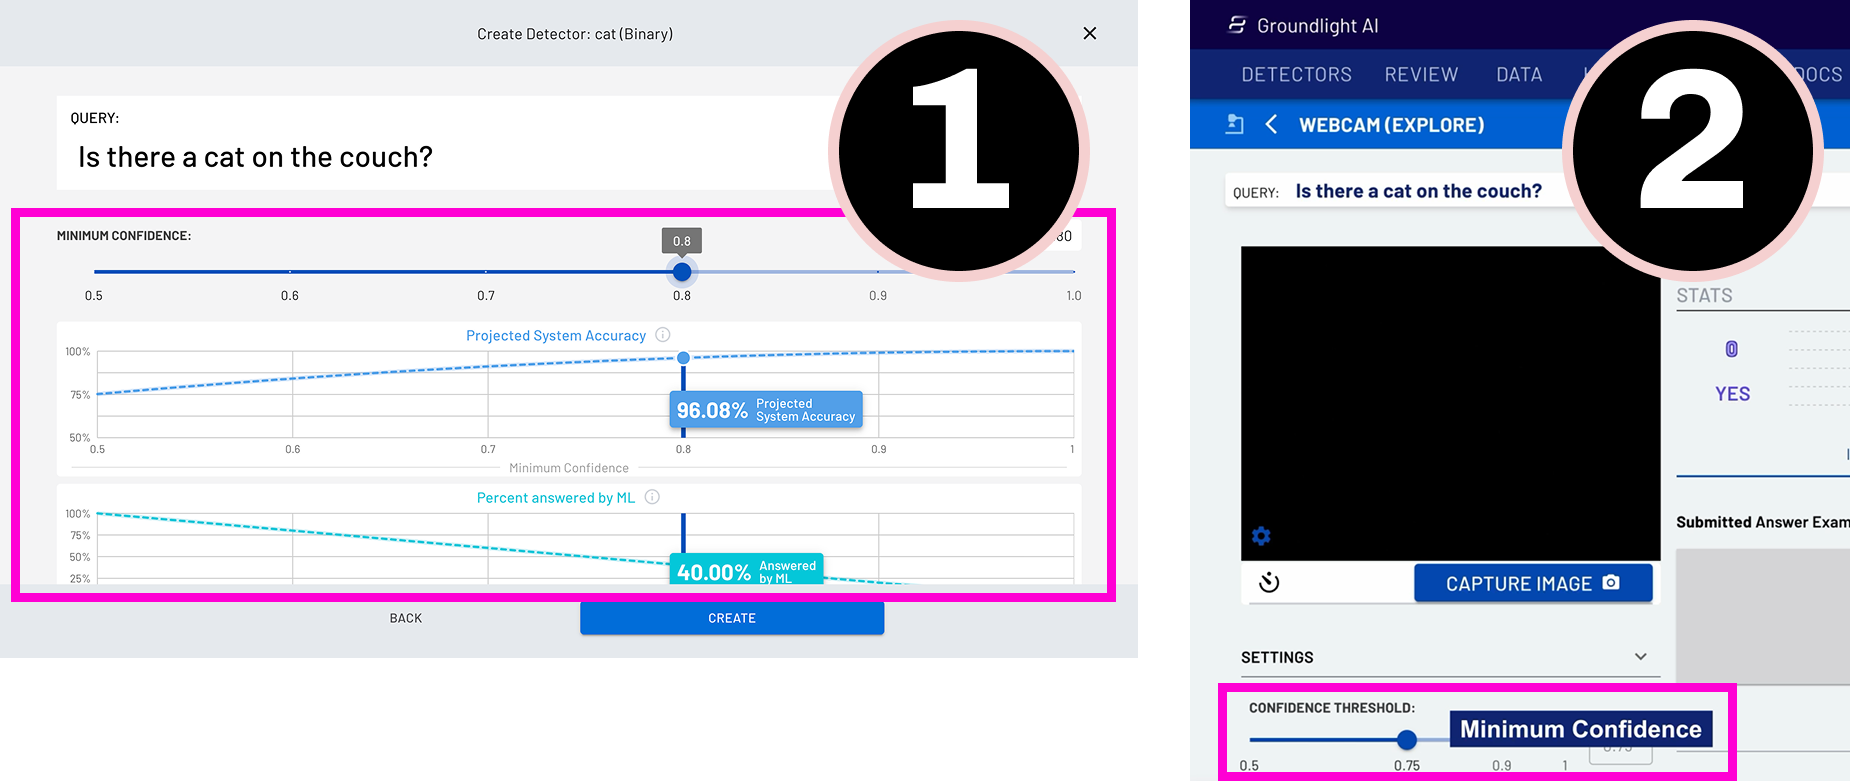
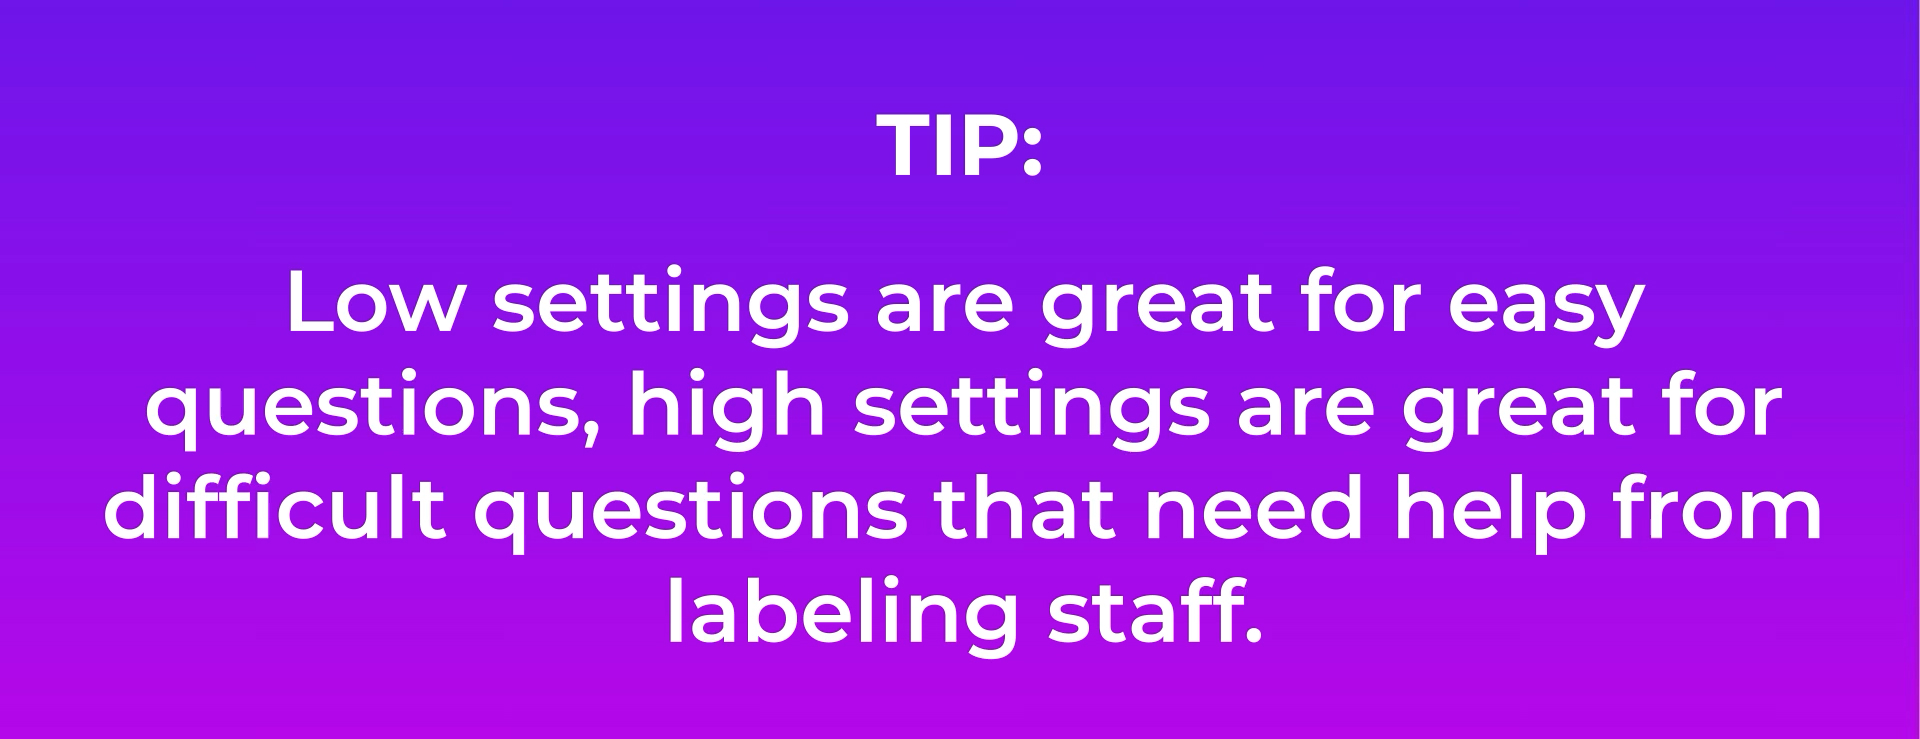
Next, you'll have to set the minimum confidence level. This is so that the model can be accurately trained to provide you with a proper Yes or No answer. Set the confidence level to 0.75, or 75%. This means that when the model is anything less than 75% confident in its answers, the image query will be escalated to a real human to answer in real-time.

6. Start capturing images
For the computer vision model to work, start by gathering data - capturing images using your laptop's camera. Before you do this, we recommend checking that your computer's camera lens is pointed in the right direction of the scene you want to capture and train your model.
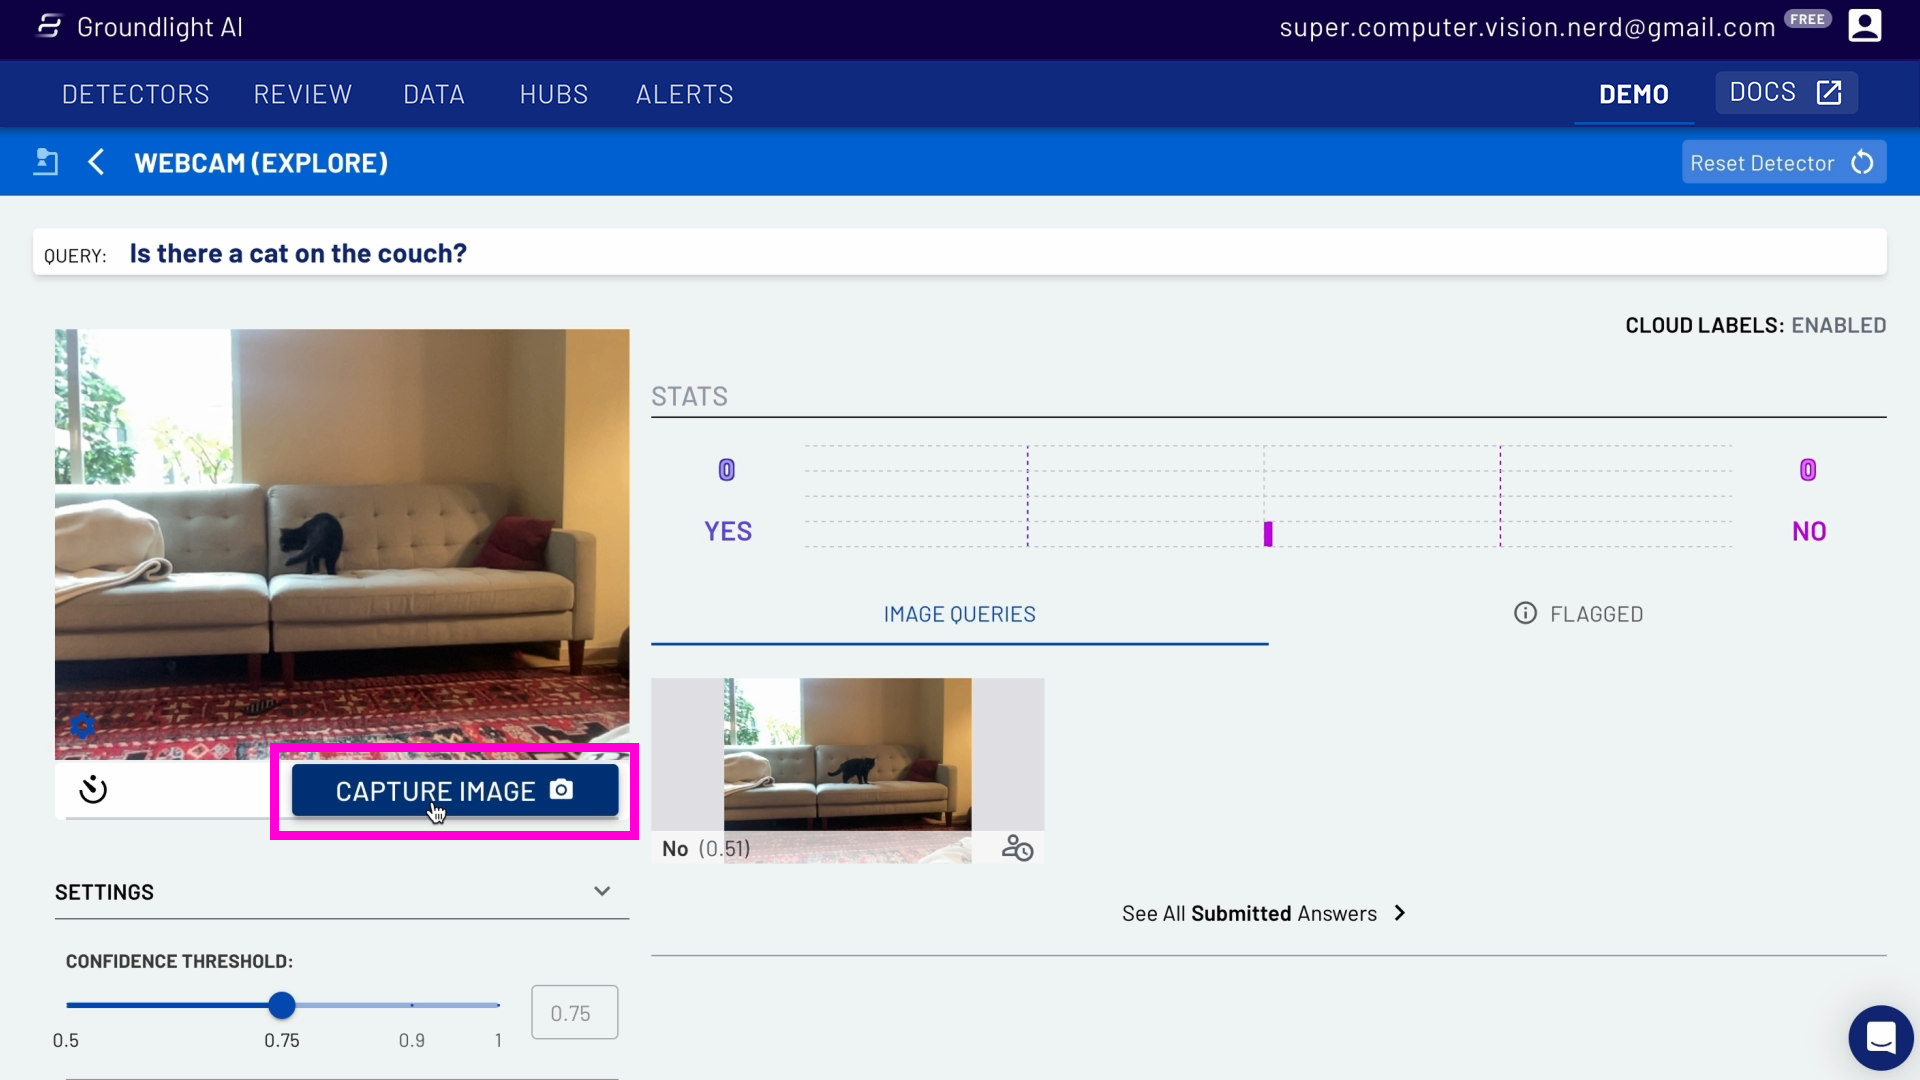
To provide the model with enough data to work with, you'll want to get about 10-15 different images. In this case, it's 10-15 images of the cat on and off the couch (allowing for Yes/No answers). To do this, simply click the Capture Image button. Get a variety of images in a couple of minutes by clicking the timer icon on the left-hand side to the Capture Image button, which turns on the auto-capture setting. Toggle it on, and this will allow your camera to take a picture every 30 seconds.
We also recommend experimenting with different scenes so that the model will get used to a variety of scenarios. See these image examples where the cat is absent from the scene but a person is on the couch, and where different objects are being placed in front of the screen. So even if the environment changes, Groundlight adapts.
7. Understanding Cloud Labeling
In the image below, you'll see that one of the images marked '0.54' and 'Yes.' This means that the model is only 54% sure that the cat is on the couch. The captured images on the right-hand side of the screen might also have a human icon next to them and a clock. This is because you're just starting out training your model, so the query is being escalated to a human who will review and confirm if it's a Yes or No image, also known as "labeling."
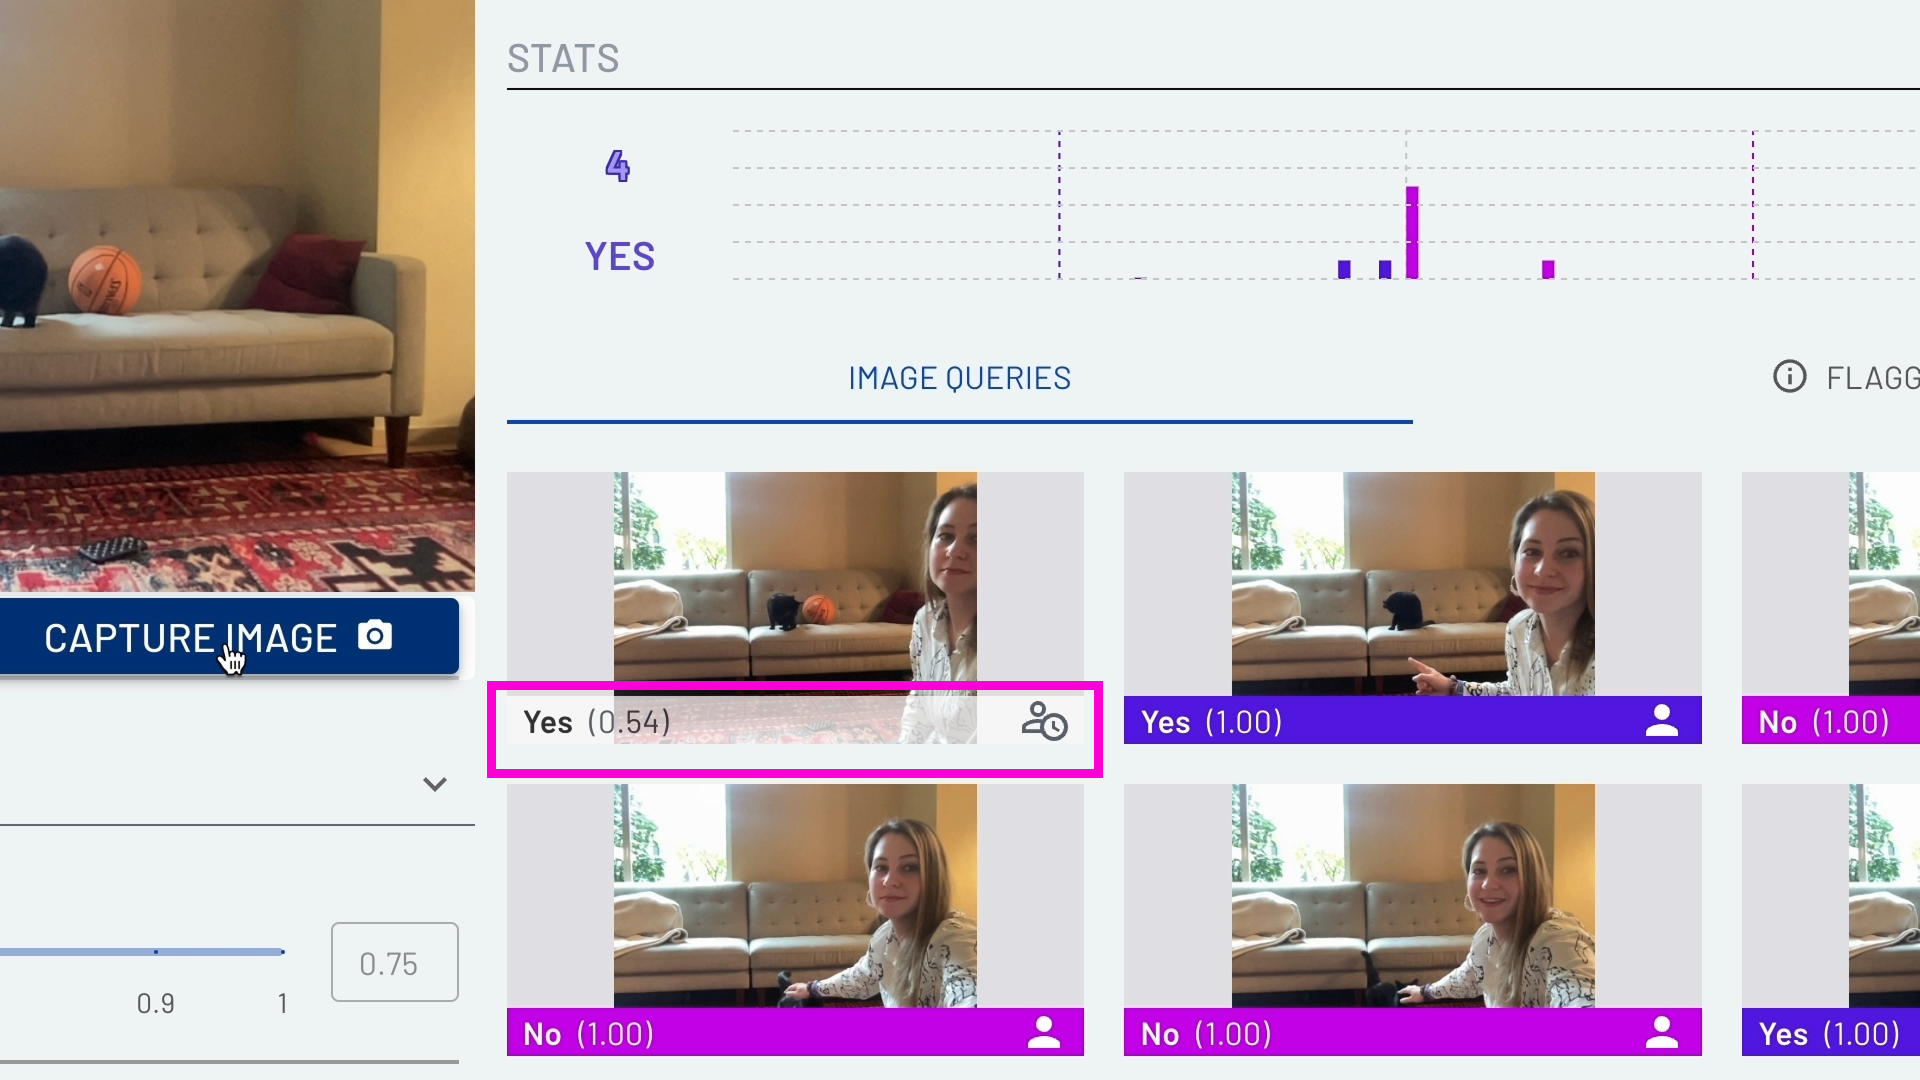
Once the model knows the answer, the label color under the image will change to either pink, "No", or purple, "Yes". The model's confidence and accuracy will increase over time as it continues to work with/receive more data. Once it's trained, it will change to a computer vision icon.
8. Get Projected Machine Learning Accuracy and labeling your image queries
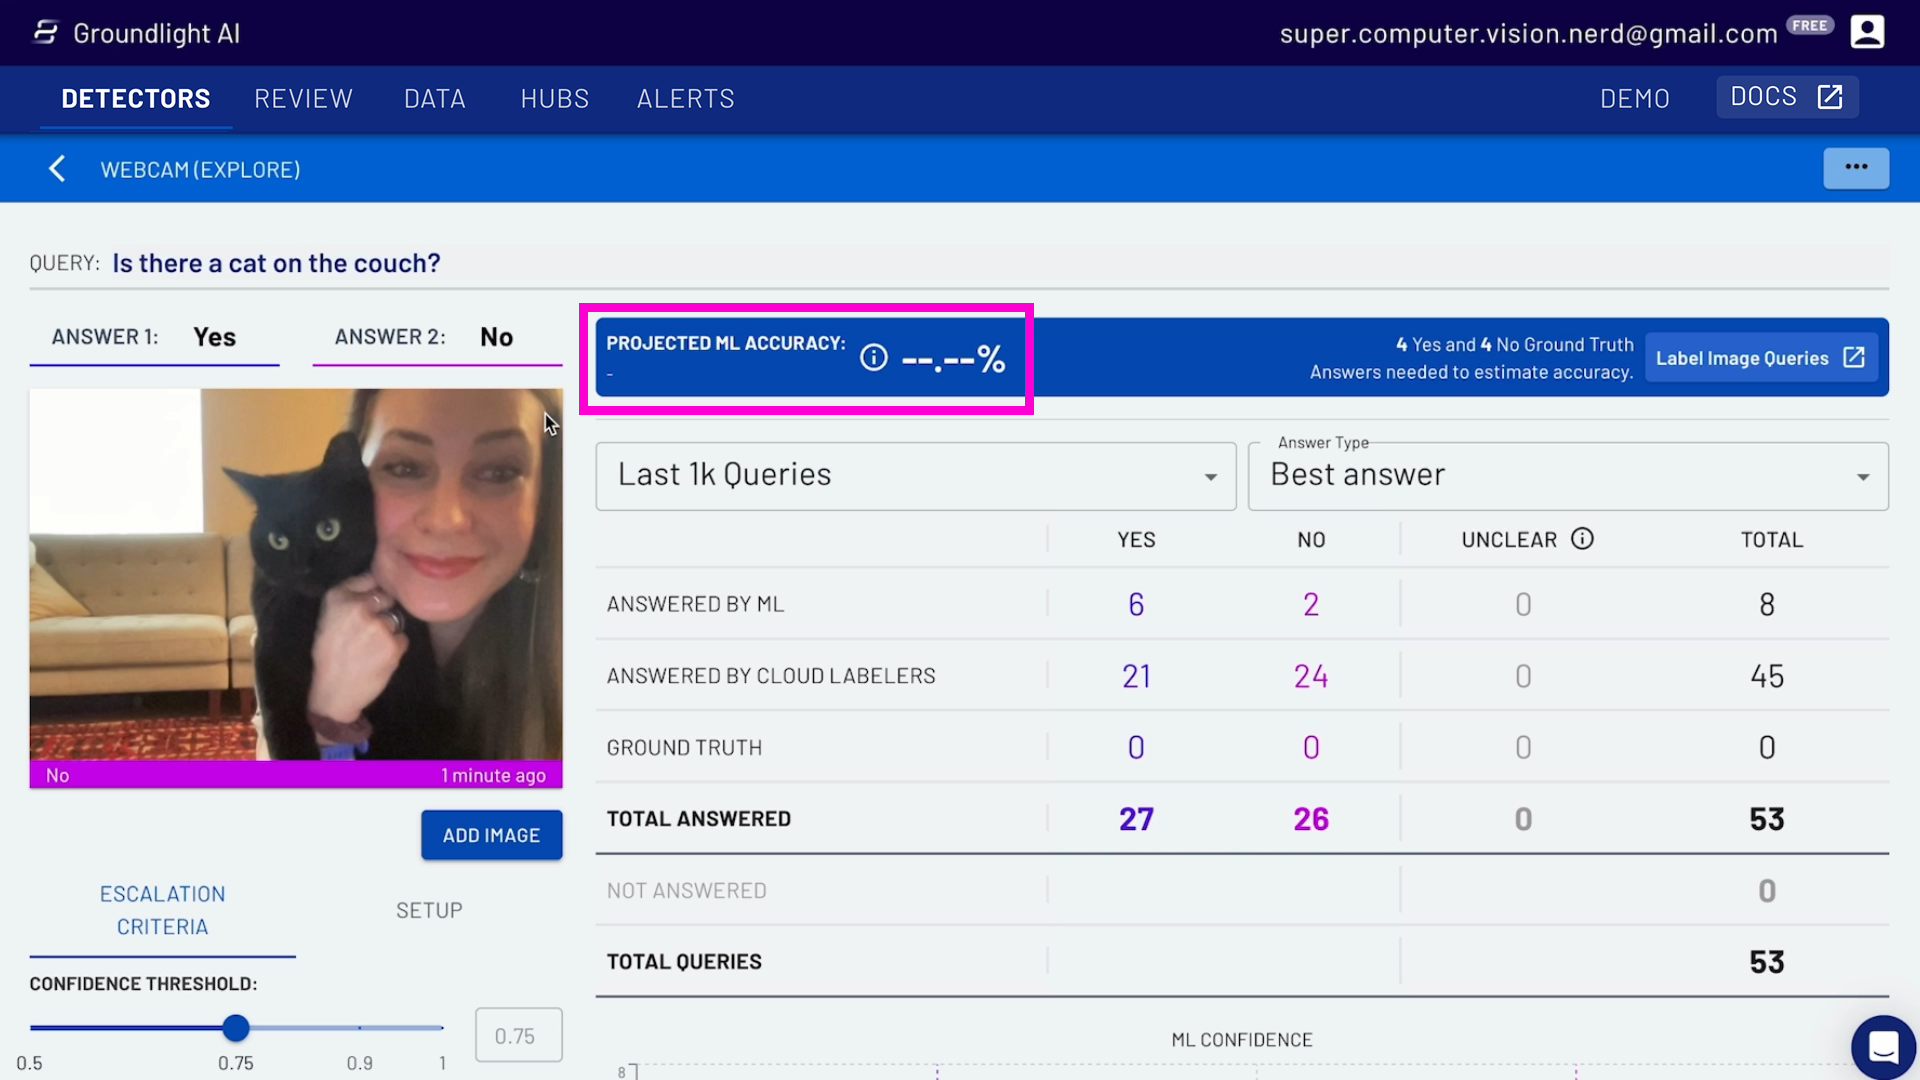
Groundlight's computer vision platform gives you easy visibility into how well our model is performing. One way it does this is by providing Projected Machine Learning Accuracy - this is an estimate of how well your model will perform on new, unseen data in the near future. Read this blog post if you're interested in understanding this a bit deeper.
You need to have enough images and enough examples of Yes and No to get a Projected Machine Learning Accuracy. If there isn't a number on your dashboard (see the above screenshot), this means that there's no Projected Machine Learning Accuracy yet, and you need to click the button on the right-hand side that's marked 'Label Image Queries' to provide the model with what are called 'Ground Truth Labels.'
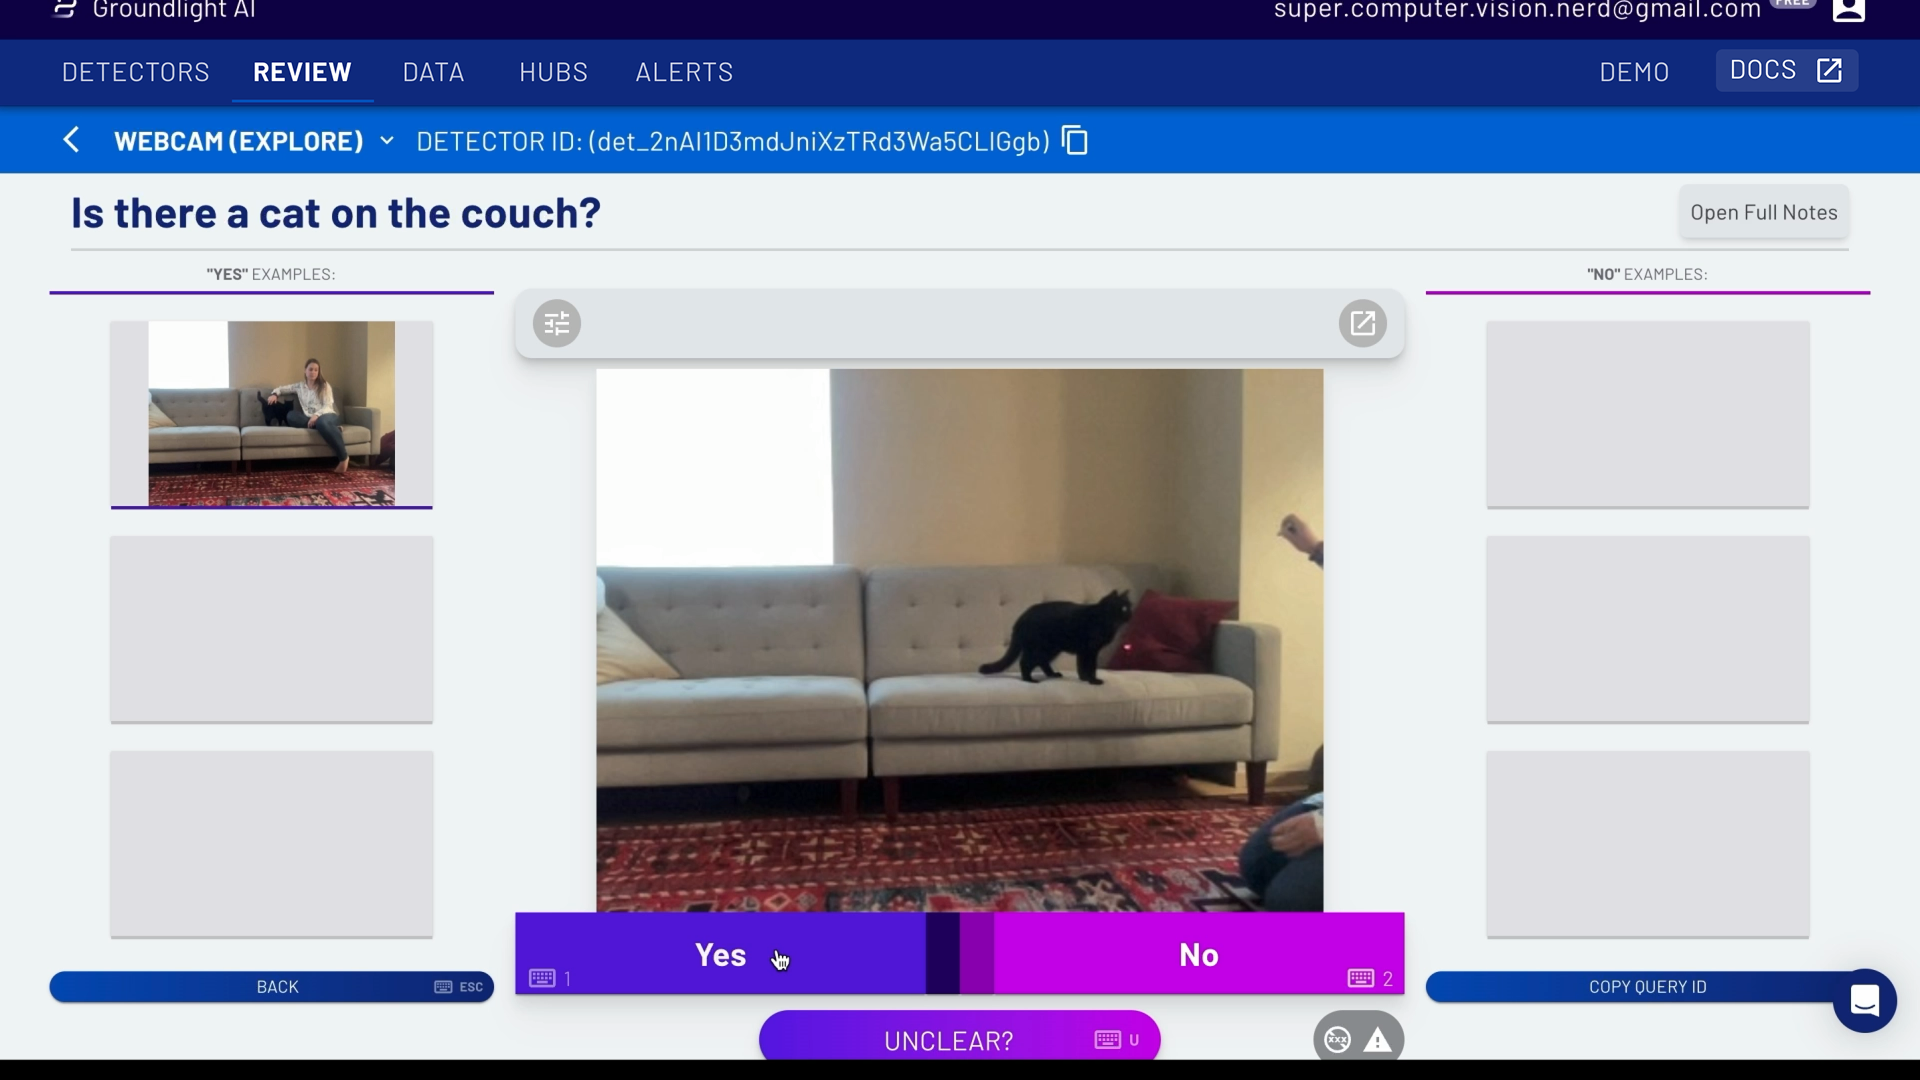
Ground Truth Labels are used as examples to help cloud labelers interpret your instructions correctly. They help convey exactly the behavior you expect from your detector, and are especially helpful for clarifying edge cases and more ambiguous images.
After that's done, you should see the Projected Machine Learning Accuracy. This screenshot shows the model at a 95% accuracy from only the small series of images it's captured and analyzed in order to create this detector.
9. Learn more about Machine Learning Accuracy details
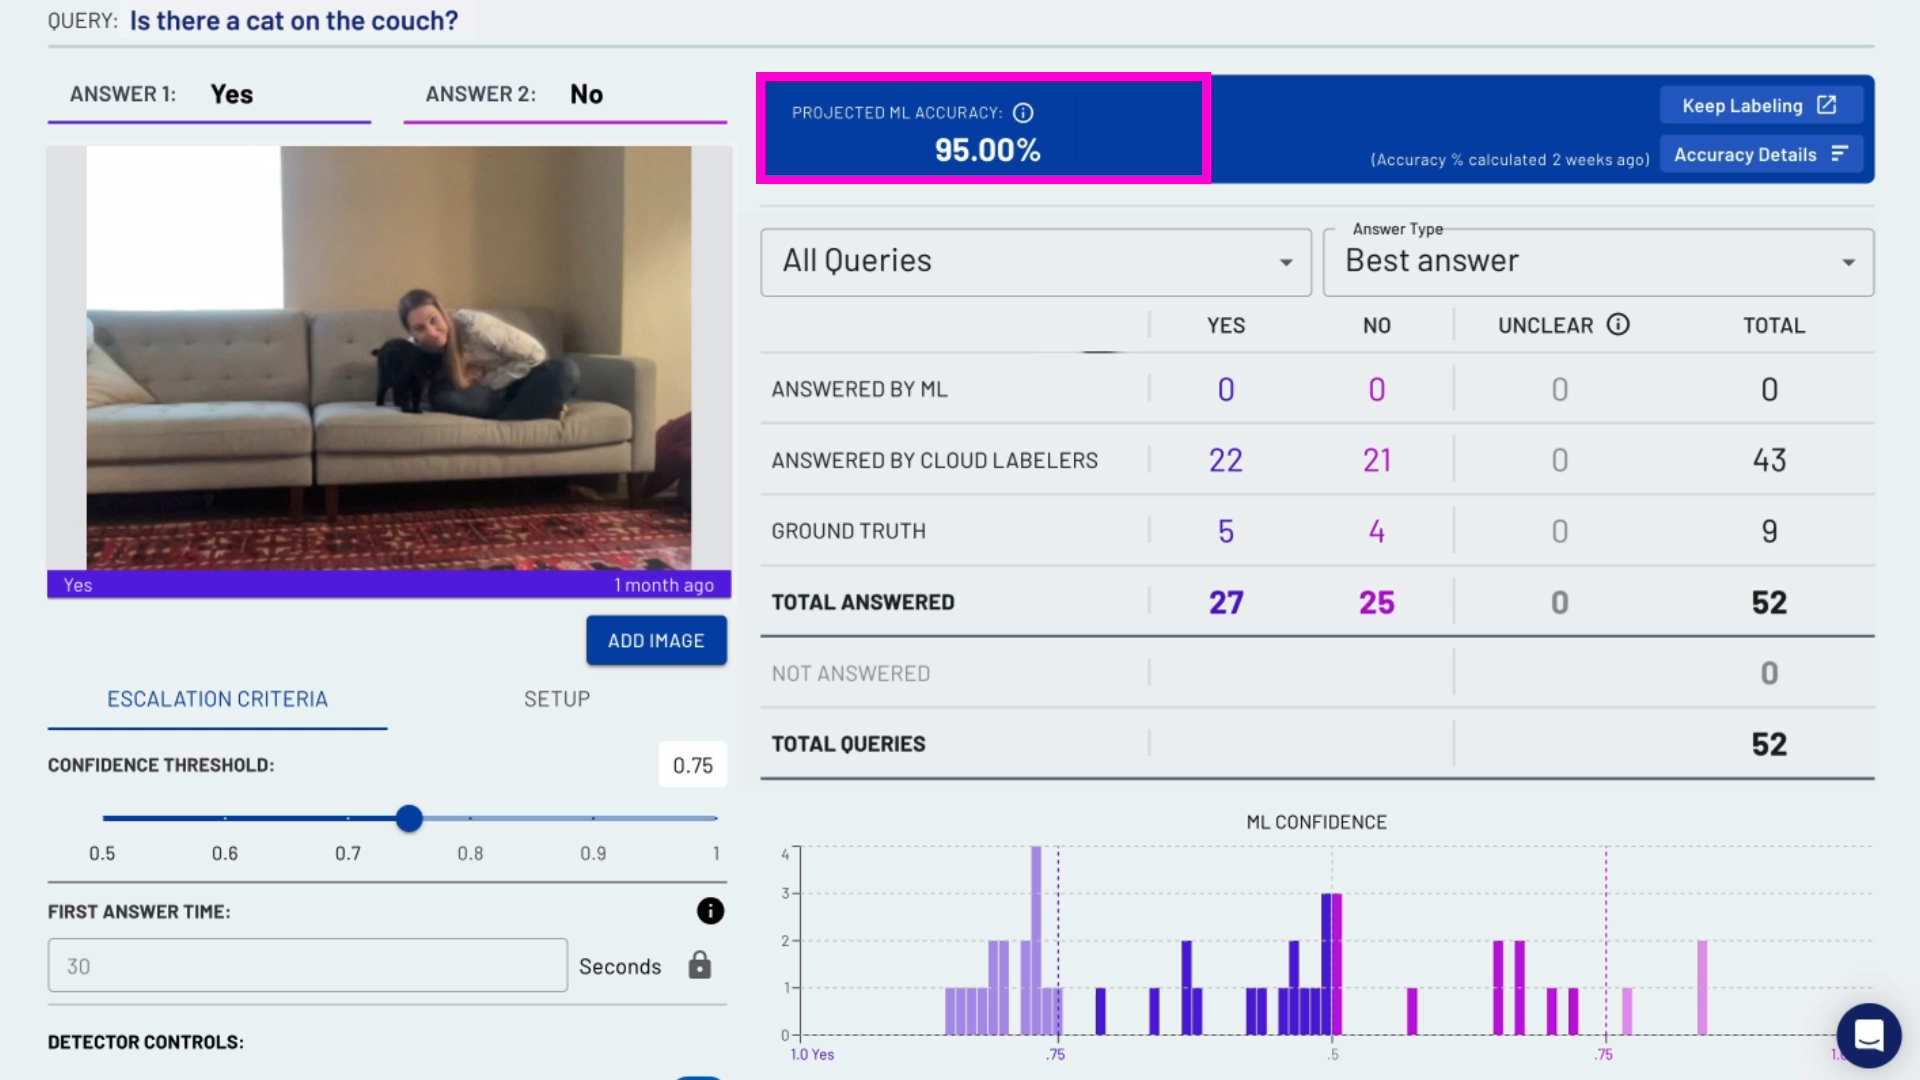
If you want to learn more about your detector's performance, click "accuracy details" on the top right-hand side of the screen and you'll get a rundown of the machine learning accuracy.
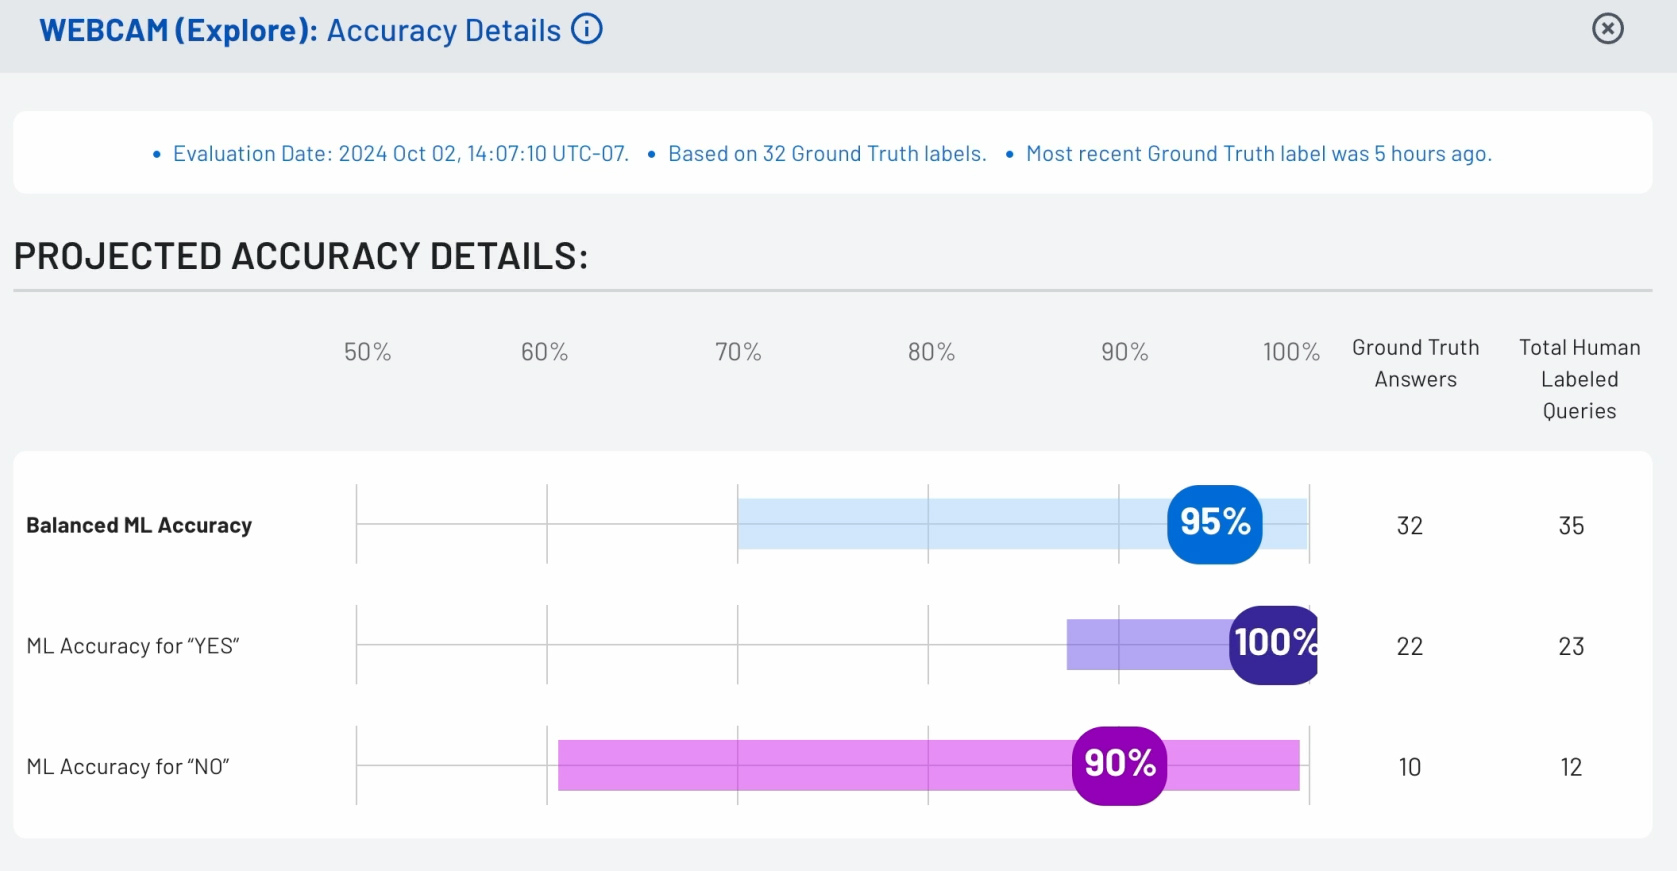
The numbers (such as 95%) represent the projected accuracy overall and the length of the bars represent the confidence intervals.
That's it!
What's next?
If you have any questions, feel free to reach out to us (and a real human will respond to you!). If you're a developer and interested in building custom applications, check out our guide on using Groundlight's Python SDK.


