I have a hummingbird feeder on my porch that brings me great joy. Once every few days I see a hummingbird at the feeder and this just makes me happy- so I’ve been thinking it would be nice to notice the hummingbirds more often!
My plan is to set up a camera pointed at the hummingbird feeder from my window. Then, I'll use a Groundlight detector to process the camera's images and send me a text alert whenever a hummingbird is present.
Here's what you'll need to follow along:
- A camera that supports RTSP. We at Groundlight recommend this Amcrest WiFi Camera for home/hobbyist use. It's relatively inexpensive (around $30 at the time of writing), supports 1080p resolution, has a night vision mode, and supports RTSP out of the box. The setup process is also quite straightforward.
- A Raspberry Pi or another always-on home server with Docker installed.
- A hummingbird feeder, along with sugar and water for making nectar.
- A free Groundlight account.
Let's get started!
Step 1. Attract hummingbirds
First, ensure you live in an area with hummingbirds! If you're in the United States, you can check this website to see if hummingbirds are present in your region.
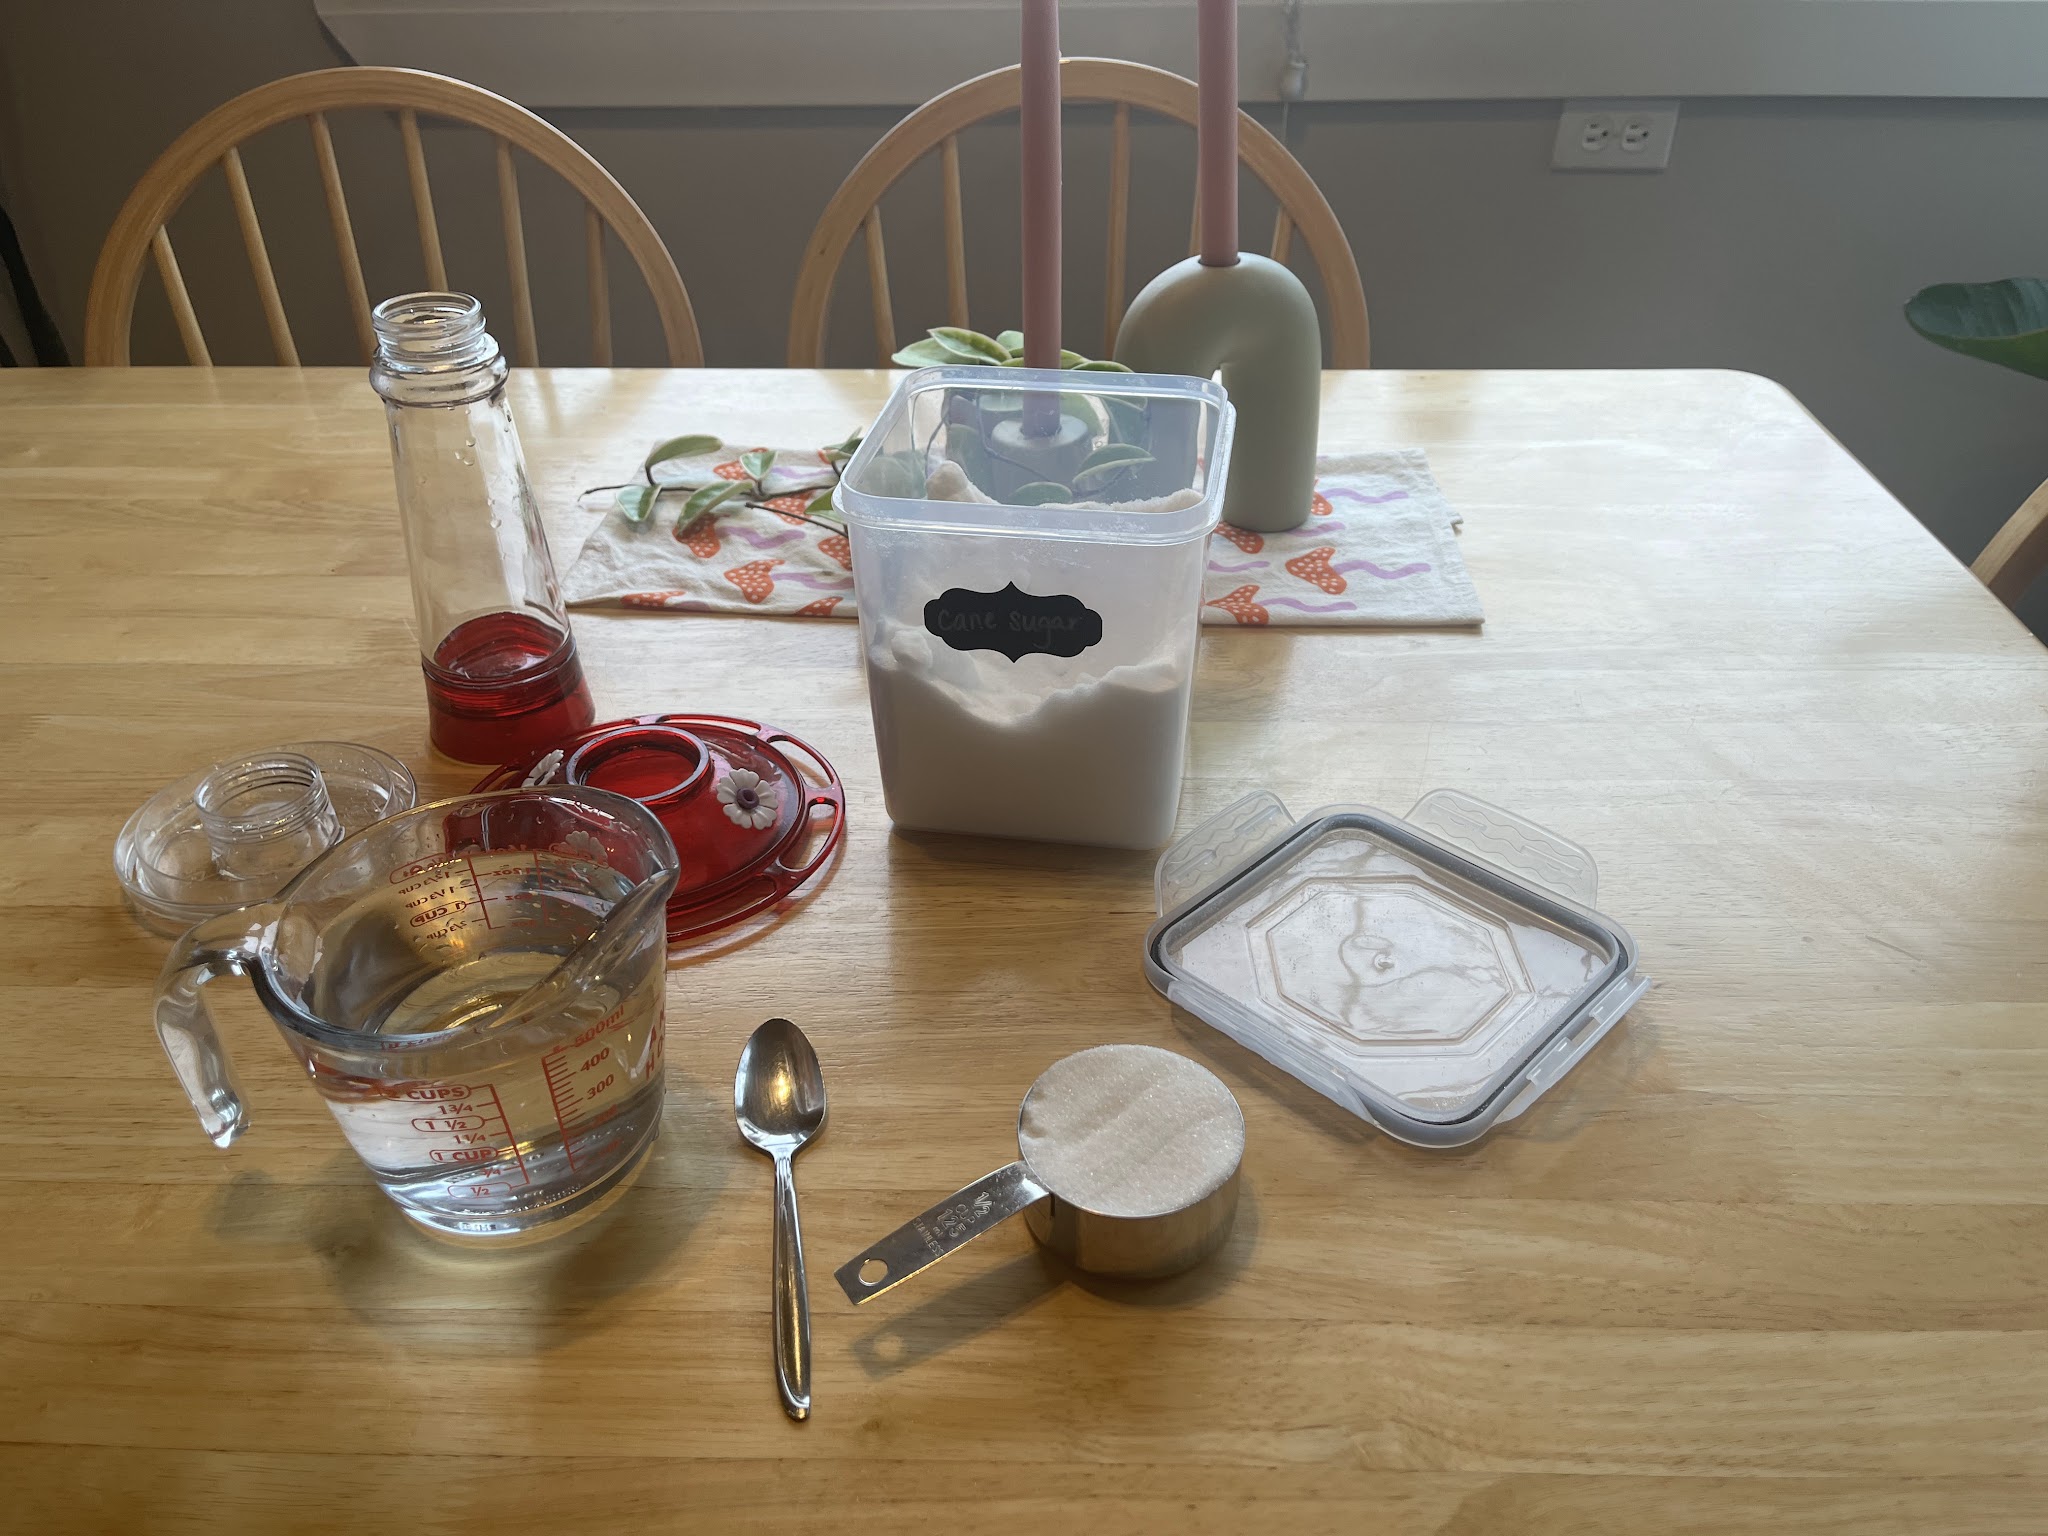
With that confirmed, let's set up your hummingbird feeder. Fill it with nectar, which you can make by mixing 1 part sugar with 4 parts room-temperature tap water.
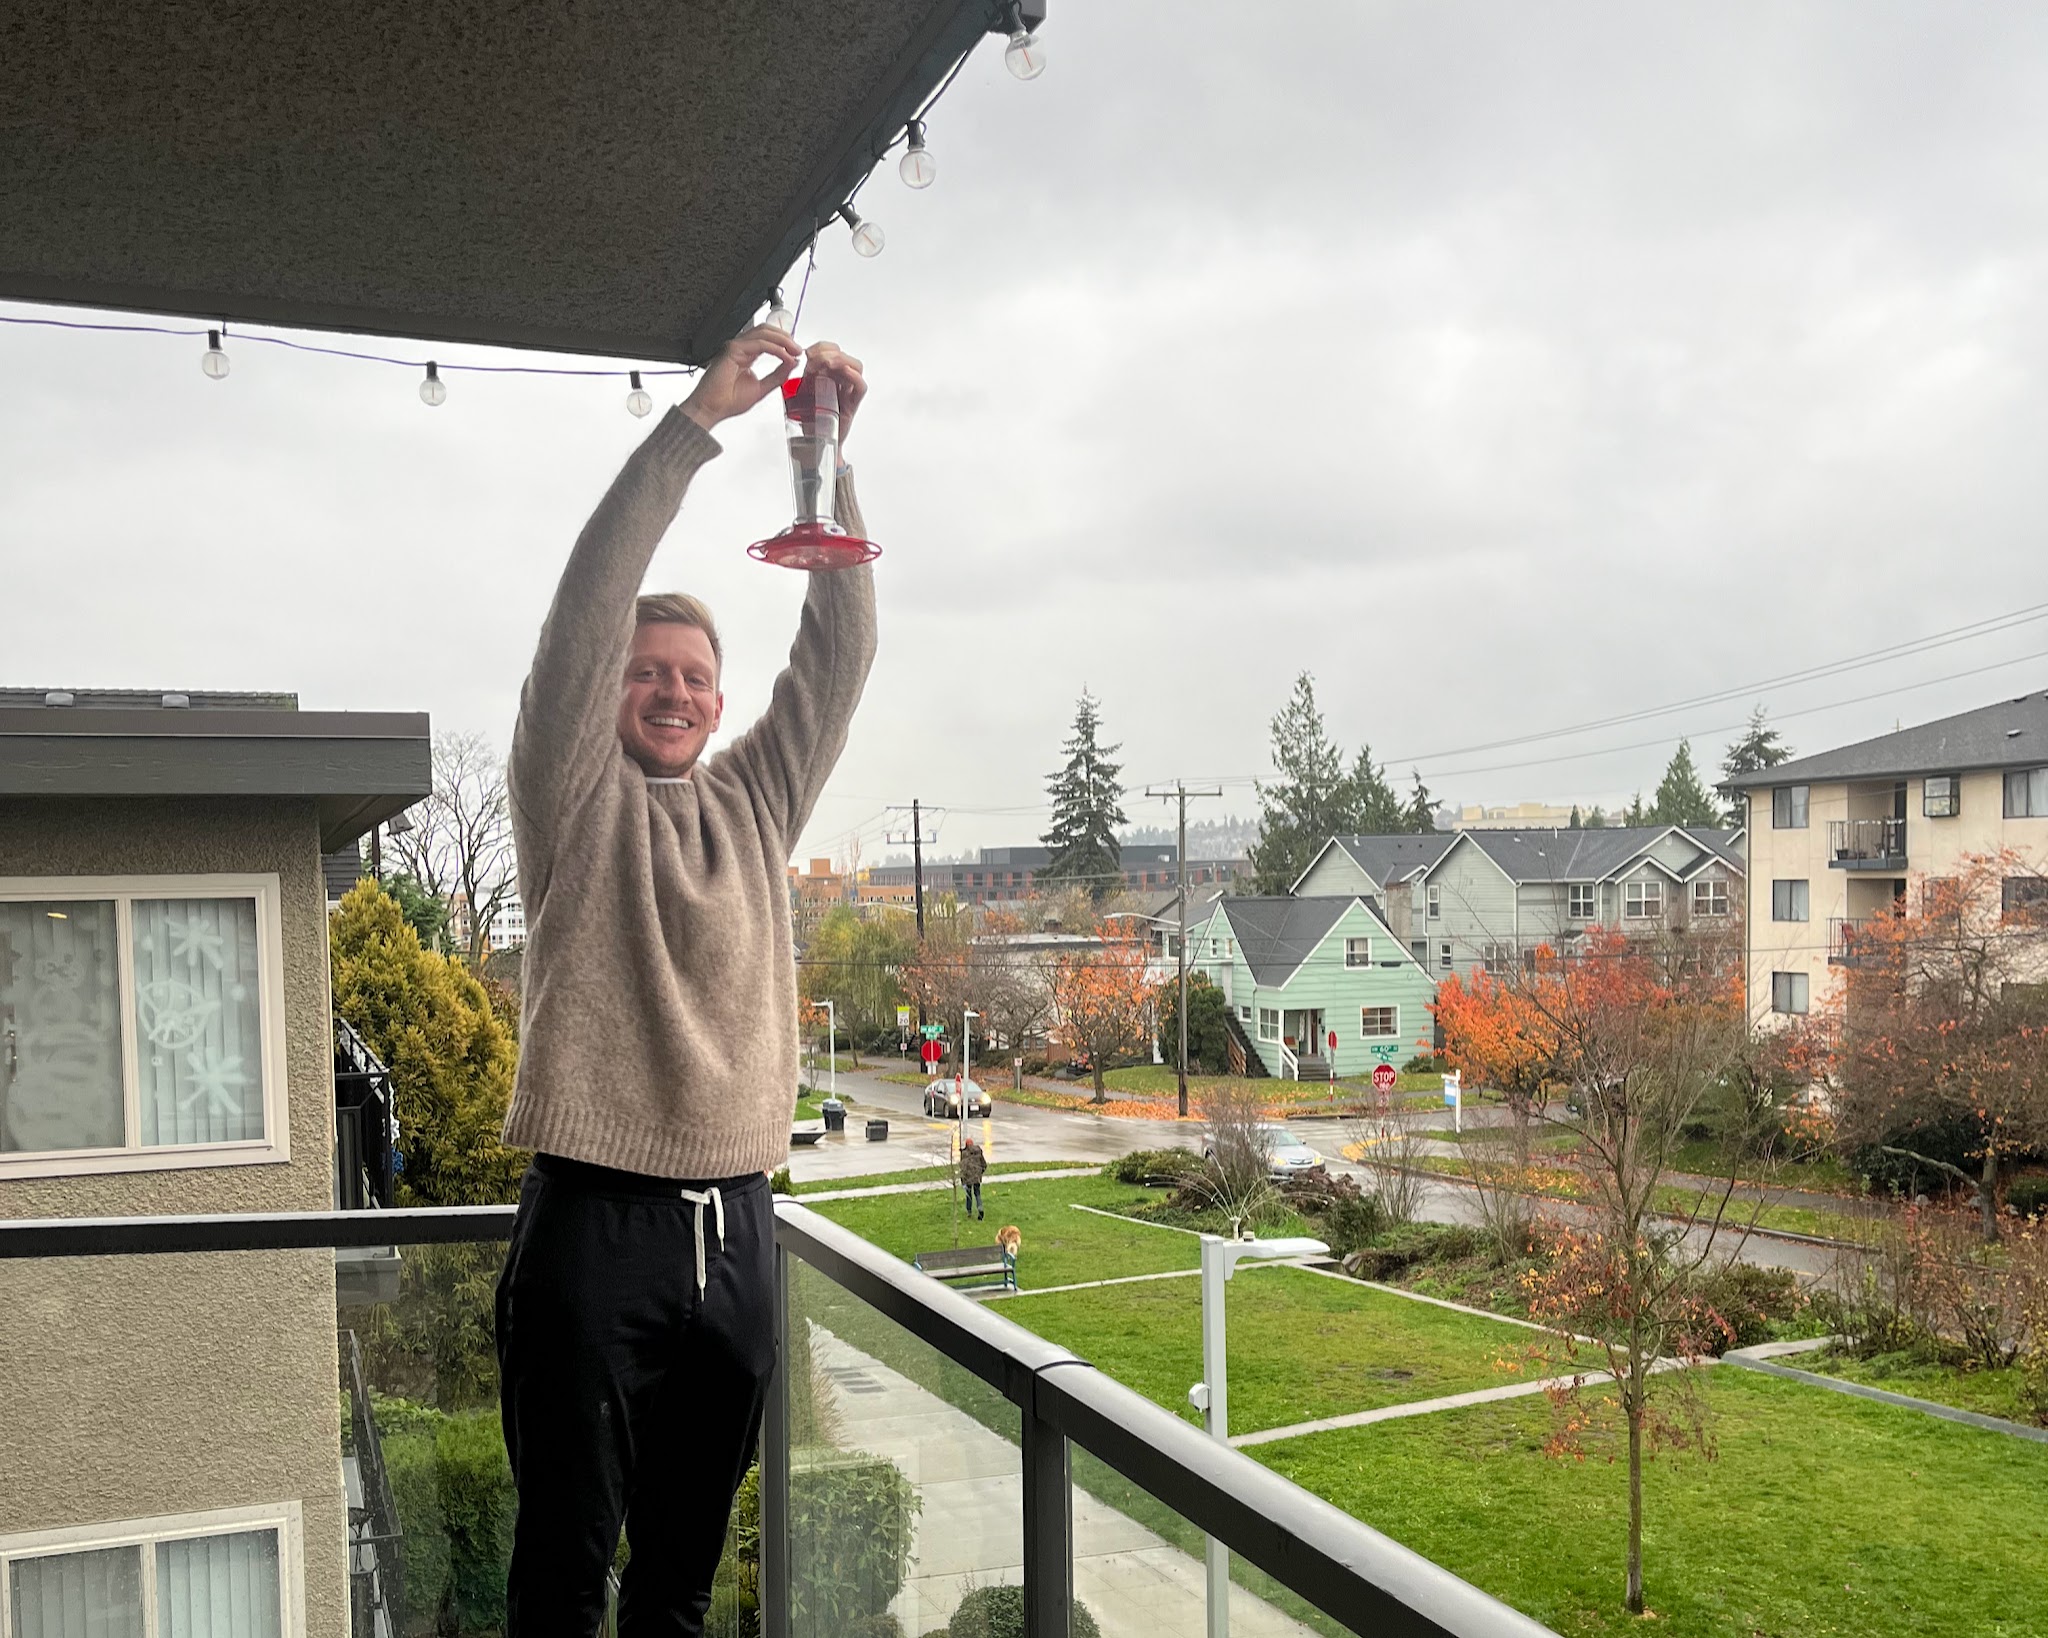
Next, find a spot to hang your feeder within view of a window!
It may take some time for hummingbirds to discover your feeder. I've had mine up for a few years, so the hummingbirds are quite familiar with it.
Step 2. Set up your camera
Follow the instructions for your RTSP-supporting camera to connect it to your local network and configure it as needed. Since I used an Amcrest WiFi Camera, I'll provide a walkthrough for that:
- Unbox your camera and plug it in.
- Install the "Amcrest Smart Home" app on your phone. Follow the app's instructions to scan the QR code on the bottom of your camera and complete the setup. You'll be prompted to create a device-specific password, which you'll need to access the RTSP feed, so remember it.
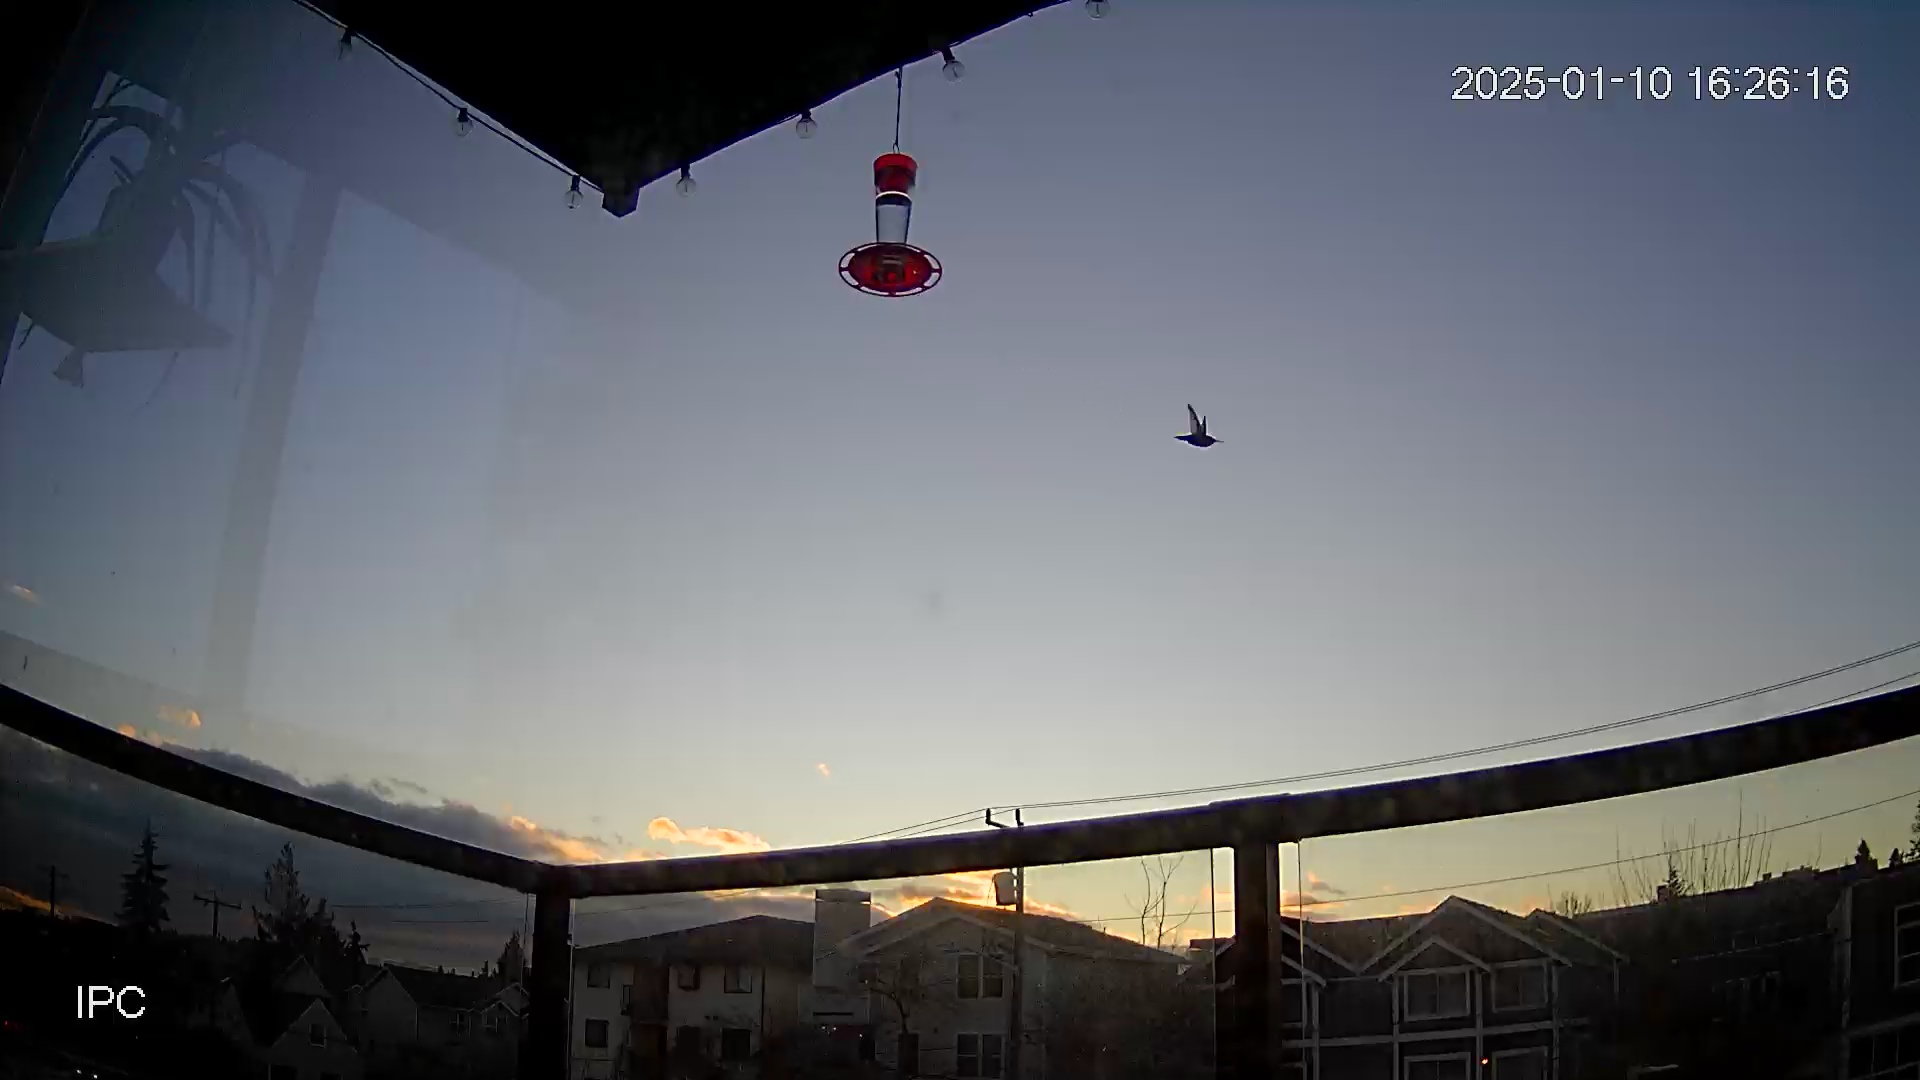
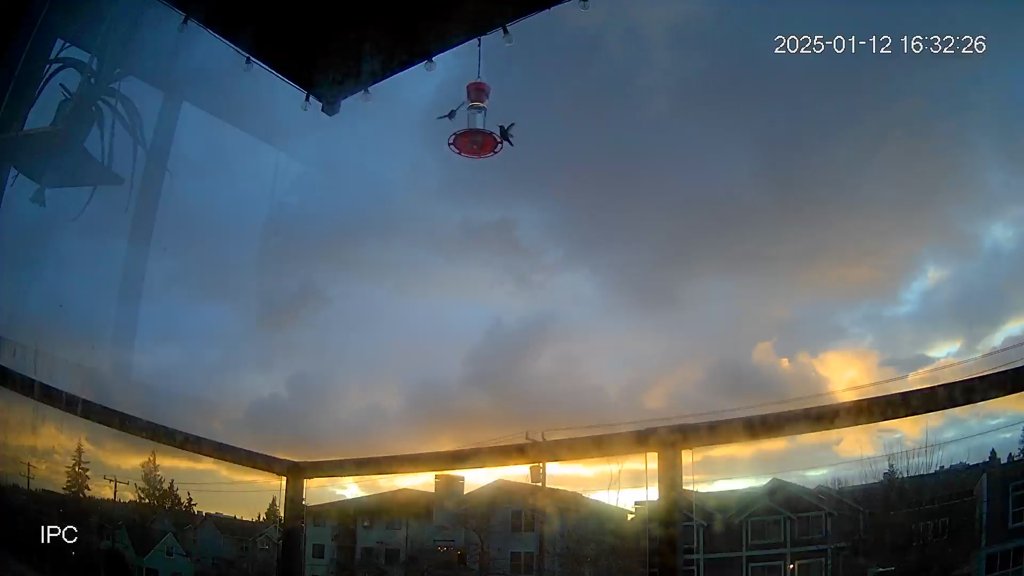
- Position your camera to view the hummingbird feeder, and verify the view through the app:
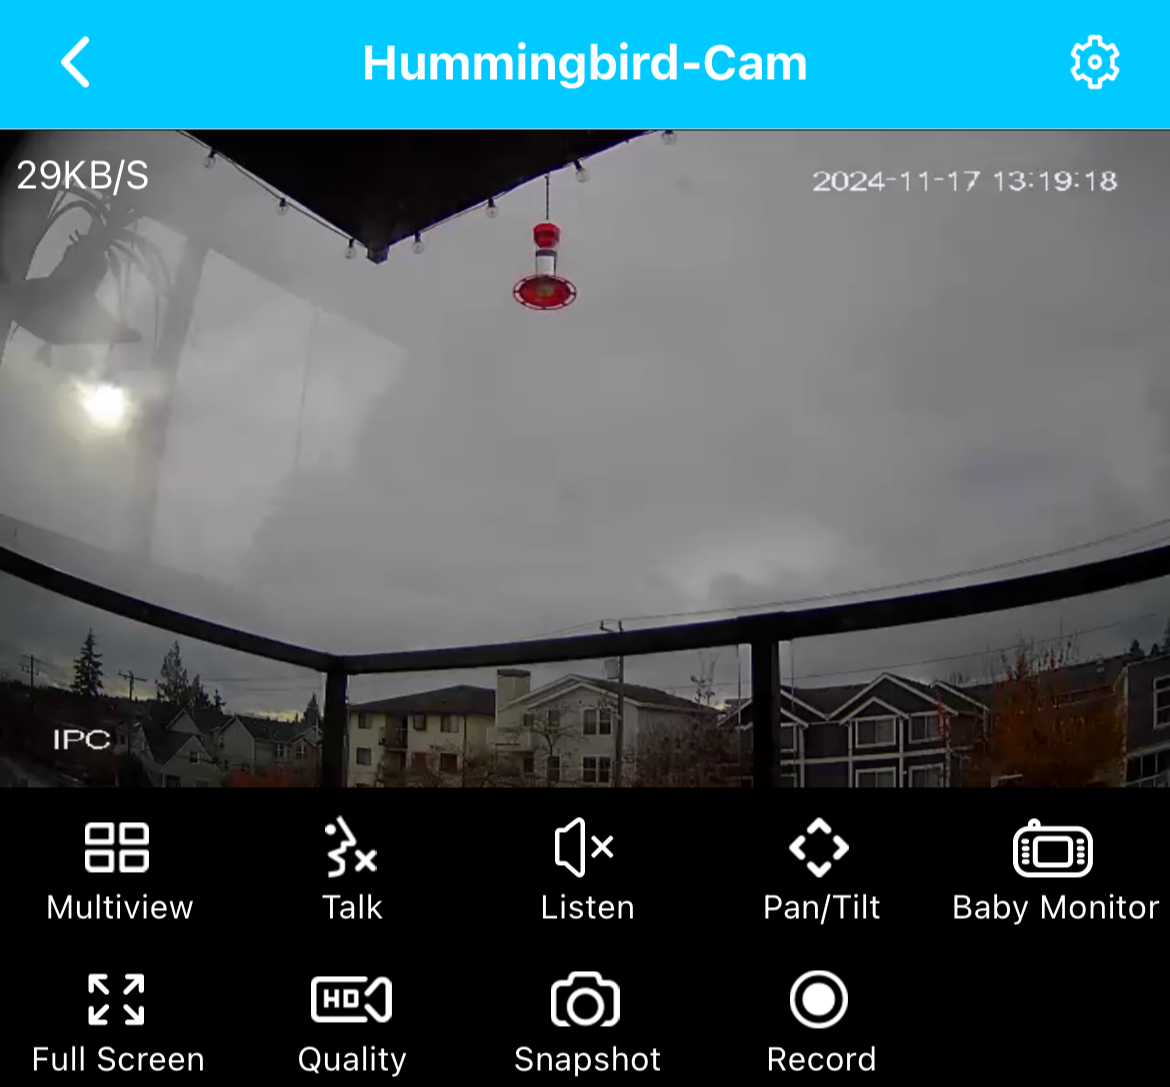
- Note your camera's IP address from the app's "Settings" > "Device Information" menu. My camera's IP address on my local network is 192.168.0.108.
- Tip: Your camera's IP address might change over time. Consider setting up a DHCP reservation to ensure it remains constant.
- Verify that you can access your RTSP stream from a computer. You can easily do this using the free VLC media player. Amcrest provides a guide here. For completeness, here's how I did it:
- In VLC, click "File" > "Open Network"
- You'll see a menu titled "Open Source", which has a spot to enter a URL. Enter the RTSP URL for your camera. RTSP URLs follow this format:
rtsp://[username]:password@ipaddress:554/path/to/camera
In the case of my Amcrest camera, the correct RTSP URL is:rtsp://admin:<my-device-pw>@192.168.0.108:554/cam/realmonitor?channel=1&subtype=0 - After clicking "Open", you should see the video stream from your camera!
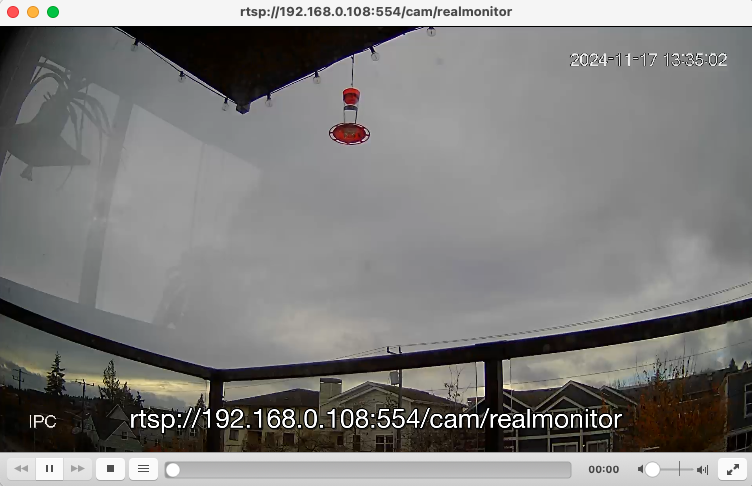
Note the correct RTSP URL, as you will need it later.
Step 3. Create a Groundlight detector
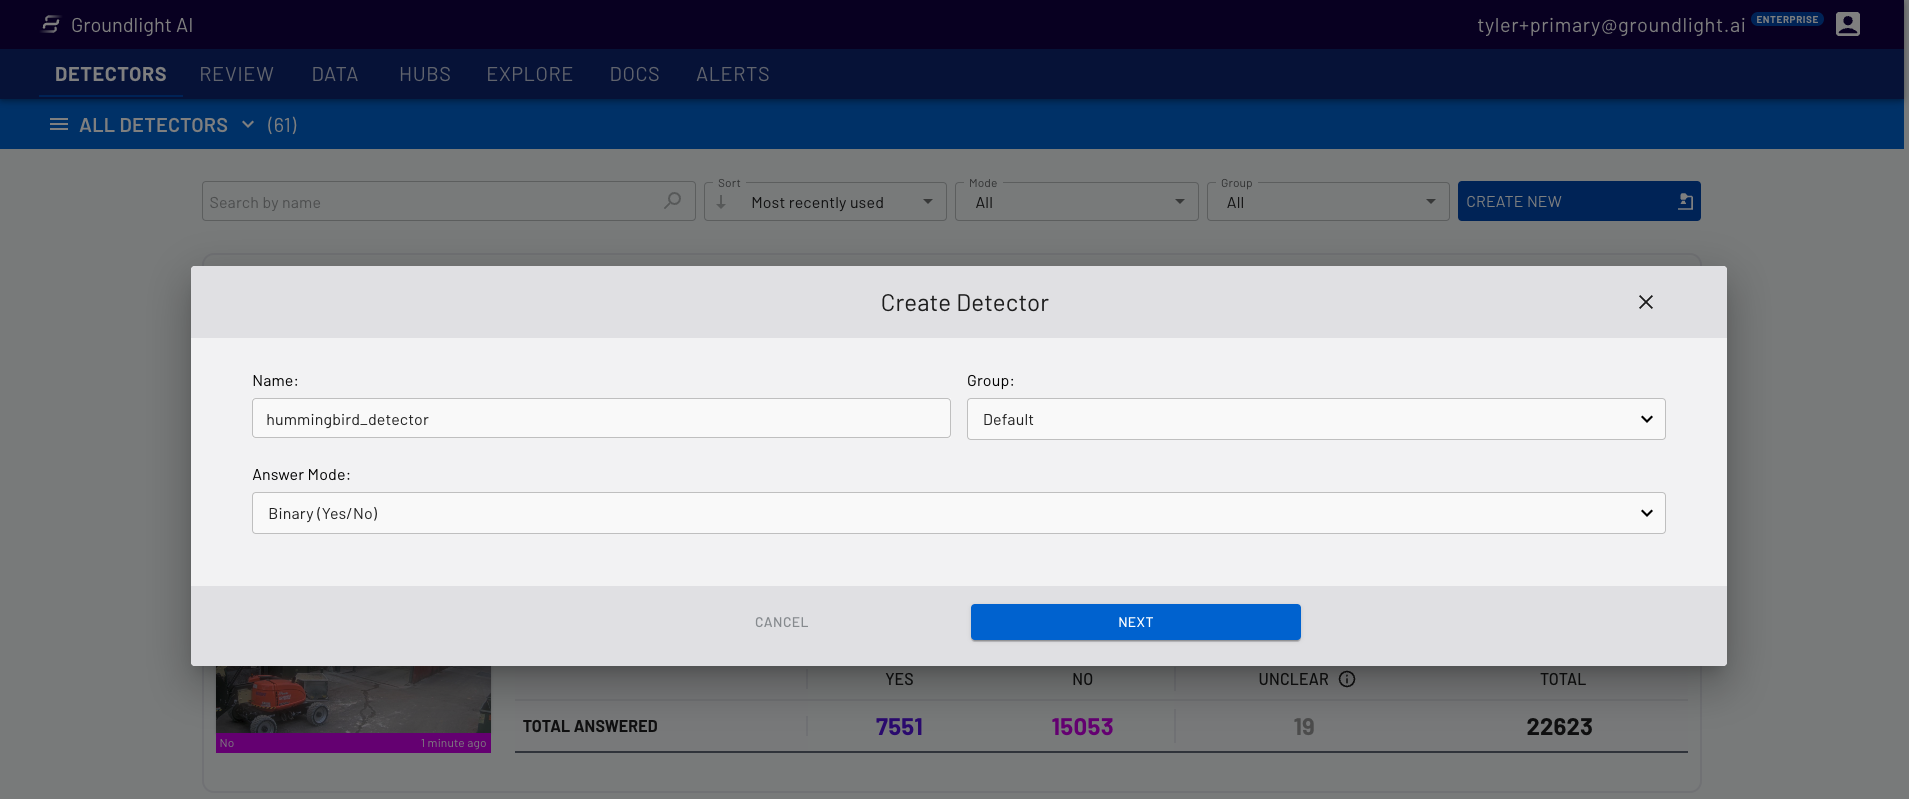
Go to dashboard.groundlight.ai and log in to Groundlight (or sign up for a free account if you don't have one).
Click "Create New" to create a new "Binary (Yes/No)" mode Detector:
Enter the query: "Is there a hummingbird at or near the feeder?" and set the confidence threshold to a value like 0.8 (you can change this later).
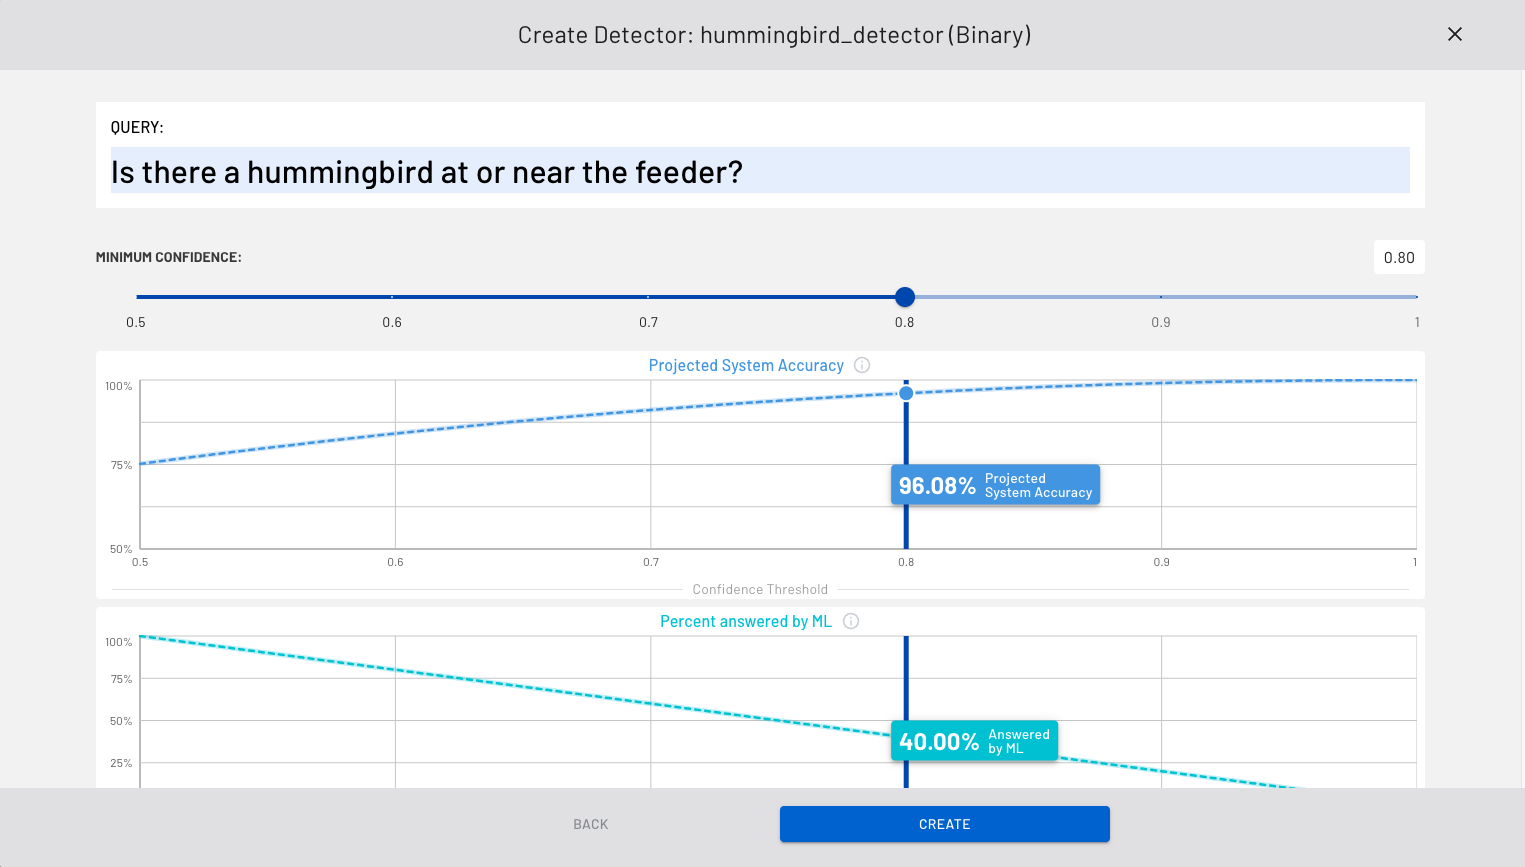
Make a note of your new Detector's ID. Mine is "det_2owcsT7XCsfFlu7diAKgPKR4BXW".
Step 4. Set up your Raspberry Pi or home server
Numerous guides cover the initial setup of a Raspberry Pi, so I'll just link to the official one. There's nothing particularly special about Raspberry Pis for this use case. I just recommend an always-on home server so that images are continuously evaluated for hummingbirds. If you use a laptop or computer that sleeps or turns off, images won't be processed when the computer is not in use.
important
Ensure this server is connected to the same network as your RTSP camera!
Raspberry Pi uses a Debian-based operating system. Follow these instructions to install Docker. You should also follow these instructions to allow a non-root user to run Docker containers.
If you can run the following command with no issues, then Docker is working properly:
docker run hello-world
Finally, you need to set a Groundlight API token on the server to authorize it to submit images to your Detector. Follow the guide here to create a Groundlight API token. Once you have your token, set it as an environment variable on your server using this command:
export GROUNDLIGHT_API_TOKEN=”api_2GdXMflhJ…”
Step 5. Start checking images for hummingbirds!
Now, we'll use the groundlight/stream tool to submit images from your RTSP camera to your Groundlight Detector.
On the Raspberry Pi / home server you set up earlier, run this command:
docker run groundlight/stream \
-t "$GROUNDLIGHT_API_TOKEN" \
-d “<your-detector-id>” \
-s "<your-rtsp-url>" \
-f 0.5 \
-v
In my case, the command looks like this:
docker run groundlight/stream \
-t "$GROUNDLIGHT_API_TOKEN" \
-d “det_2owcsT7XCsfFlu7diAKgPKR4BXW” \
-s "rtsp://admin:<my-password>@192.168.0.108:554/cam/realmonitor?channel=1&subtype=0" \
-f 0.5 \
-v
This will start submitting images to your Detector from your camera at a rate of 0.5 frames per second (1 frame every 2 seconds).
Once you see this working, stop the container with CTRL+C and restart it with this slightly modified command:
docker run –detach groundlight/stream \
-t "$GROUNDLIGHT_API_TOKEN" \
-d “<your-detector-id>” \
-s "<your-rtsp-url>" \
-f 0.5 \
-vThis will allow the container to run continuously in the background, even if you close your terminal session.
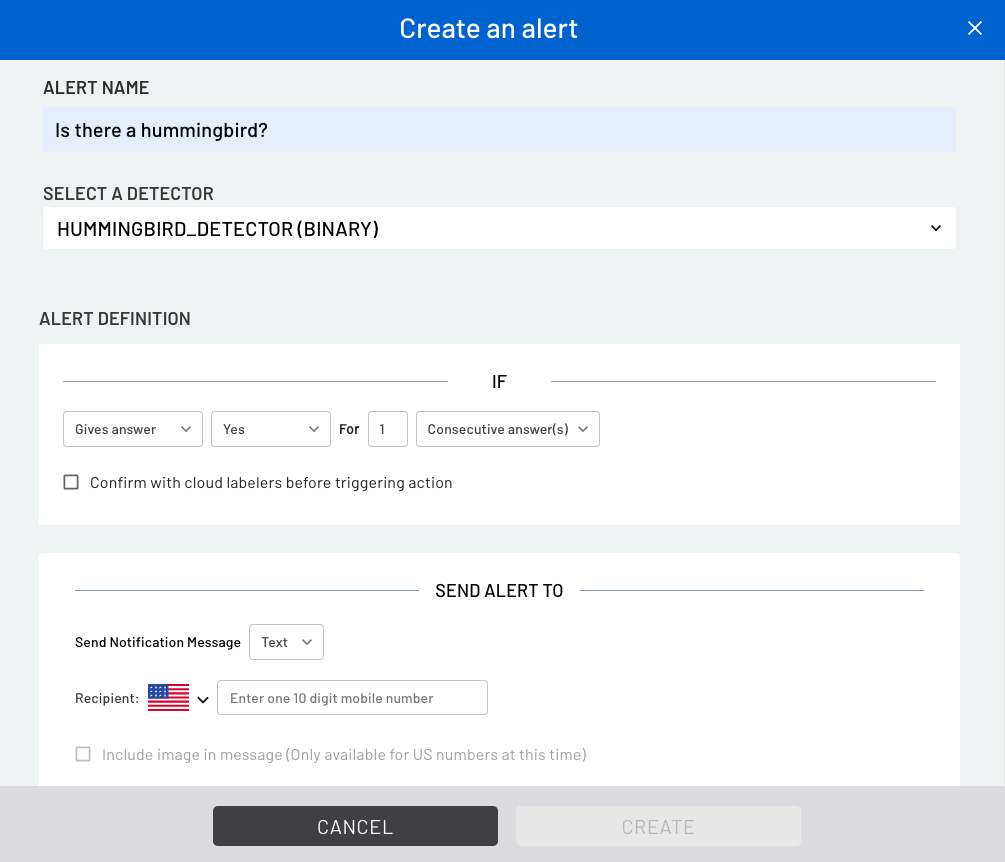
Step 6. Configure a text-message alert for your detector
Go to the Groundlight Alerts tab:

And follow the Alert creation flow to set up an alert for your detector:
And voilà! The hummingbird detector is up and running.
After a few hours, I checked the performance of my detector on the Groundlight Dashboard.
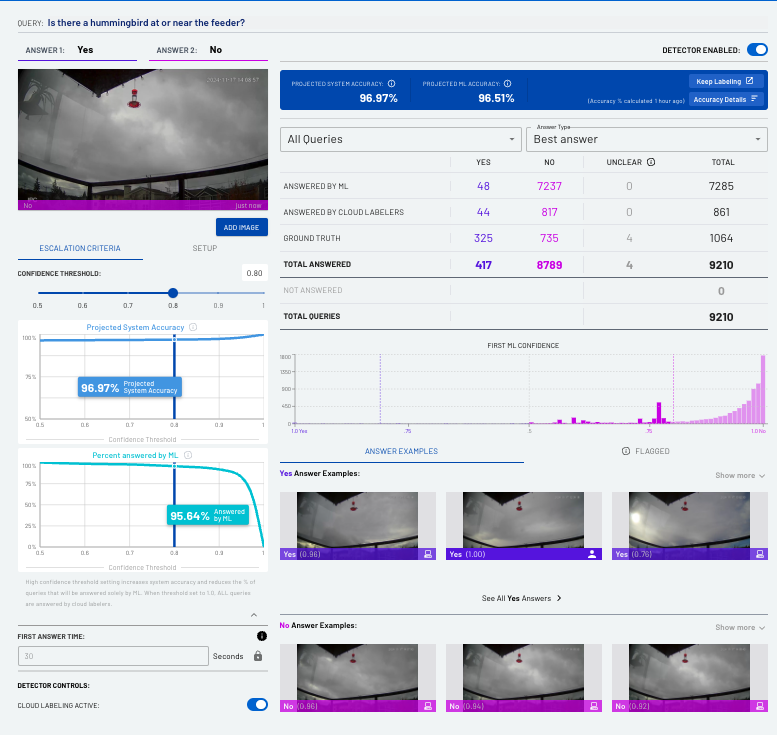
Performance looks great! I'm getting very accurate ML results. My experience with the text alerts has been excellent—I've had zero false positives (alerts where no hummingbird was present), and I'm honestly surprised by how often hummingbirds visit my feeder!
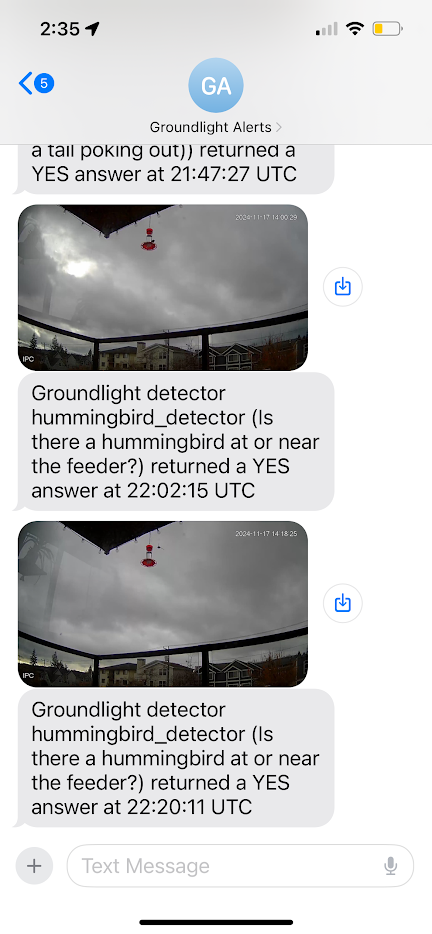
Action shots!